Graphics Programs Reference
In-Depth Information
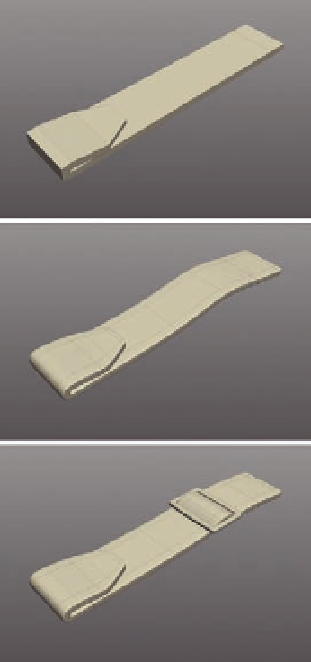
Start work on the i rst part of the strap.
FIG. 10.28
●
When this is subdivided, it will be too soft, so
Bevel
the outer edges.
●
Finally, create the buckle you can see in Figure 10 28c. This again is formed
from a cube.
The upper part of the strap is complete, so now let's create the clip, which will
sit between the two parts. We don't need to create a fully working clip, as it
will not be seen open, so don't worry about creating all the internal workings
for now.
●
As a starting point, duplicate the buckle you created earlier and place it at
the upper end of the clip.
●
With that in place, create a cube and adjust it to form the basic shape of the
lower end of the clip (Figure 10.29a). The cube was scaled to the general
size before being adjusted with extra edge loops to help form the shape.
●
Again, once this is subdivided it will appear too soft, so
Bevel
all the outer
edges so it retains its shape (Figure 10 29b).
●
We now need to create a recess on either side to give the illusion that the
clip is hollow. To do this, simply select the polygons and
Extrude
them,
pushing them into the model.