Graphics Programs Reference
In-Depth Information
dialog when a memory card is detected”. It is a good idea to rename camera
i le folders. You might also want to check the “Ignore camera-generated folder
names when naming folders” box as well.
Step 2: Connect Digital Media
Place your media card into the card reader or attach your camera with its
supplied cables. Lightroom will automatically recognize the input image data
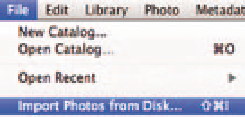
and launch the Import Photos window for you. If, for some reason, the import
window does not appear, the Import Photos dialog box can also be accessed
by choosing the File Menu Import Photos from Disk, or by simply clicking
the Import button at the lower left corner of the Lightroom interface and
choosing either your card or device. From this dialog box you can also import
images from other drives or folders on your hard drive.
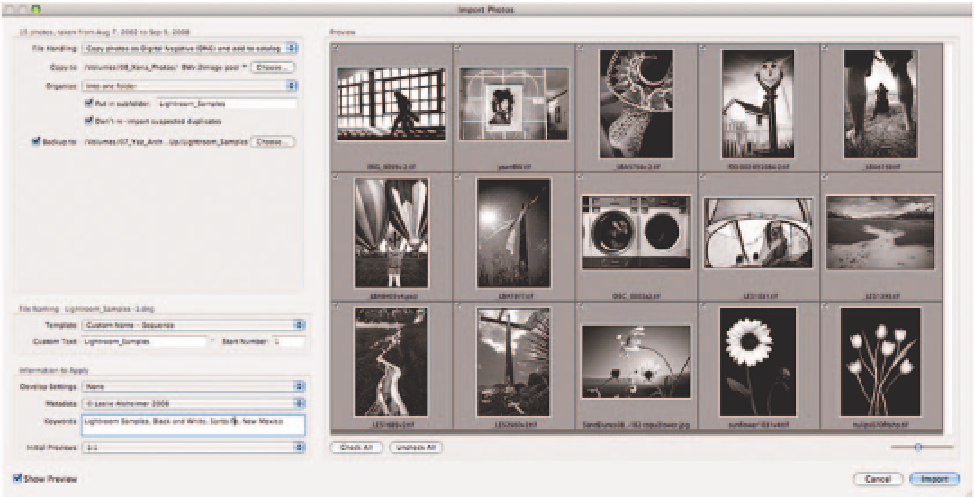
Step 3: File Handling
Next, the Import Photos dialog box will appear. It is always best to work
top down within dialog boxes, so we will start with the i rst drop-down
menu at the top of the Import Photos box, “File Handling”. This drop-down
menu of ers a few choices to import your images into Lightroom. The
i rst choice is to import images from their current location. This would
be an excellent choice if you had already copied the image i les onto the
computer or an external drive. If you want to copy images directly from
your compact l ash card or SD card, you will want to copy the image i les to
the hard drive i rst. I am going to bypass this choice. The next choices are to
“copy or move the photos to a new location and import”, or to “convert to
DNG and import”. As an advocate of the DNG methodology for raw image
storage, this workl ow protocol highly recommends the “convert to DNG”
option for import.


Search WWH ::

Custom Search