Graphics Programs Reference
In-Depth Information
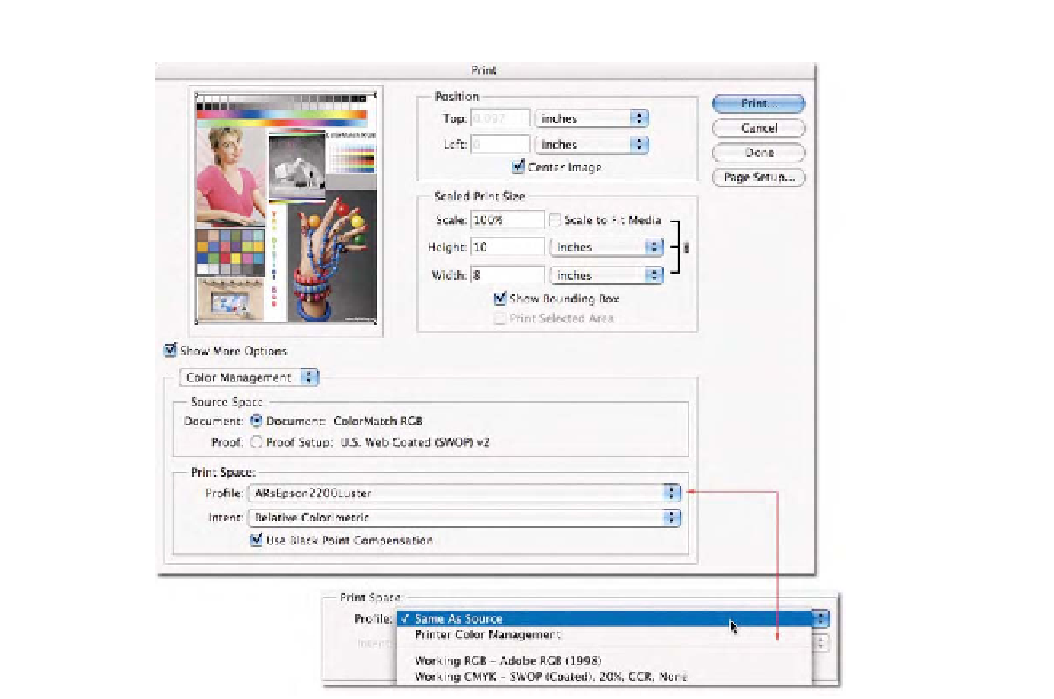
Fig. 2-22
The
Print with
Preview
command shown
here indicates the
document seen in the
preview is in ColorMatch
RGB, and will be converted
into the output profile for
my Epson 2200 using a
relative colorimetric intent
with Black Point
Compensation. The
functionally is the same as
the
Convert to Profile
command. Note that the
Profile
pop-up menu is
where the
Same as Source
and
Printer Color
Management
options can
be accessed, as seen in
this cutout.
Source Space:
As seen in Fig. 2-22, the document is in ColorMatch RGB.
This is indicated as the
Source Space
, seen next to the
Document
Radio
button. Like the
Convert to Profile
command, the source space is not
editable. If the document is untagged, Photoshop will indicate this but
will use the current working space profile as the assumption for the
untagged data. Notice that in Fig. 2-23, the document I'm attempting to
print is untagged and the document space is labeled
Untagged RGB
.
Below the
Document
radio button is a radio button called
Proof
that we
could select (see Fig. 2-24). The color space listed next to this radio button
is the ICC profile and rendering intent currently selected in the
Proof Setup
dialog previously discussed. The
Proof
option produces a three-way color
space conversion for proofing. Suppose you are working with an image
in ColorMatch RGB. You are going to convert the document to CMYK to
send to a printing press. However, before you do this, you'd like to print
this document to your Epson 2200, using this printer to simulate the
CMYK process. In other words, you want the Epson to simulate what the
printing press will produce. You could conduct an RGB-to-CMYK con-
version for the press, then a CMYK-to-RGB conversion for the Epson

