Graphics Programs Reference
In-Depth Information
The Magic Wand tool makes a selection based upon the similarities of tone and color, but it can go bey-
ond that with a few adjustments.
1
Choose File > Browse in Bridge, or File > Open and navigate to the advps03lessons folder. Locate the
image named
advps0304.psd
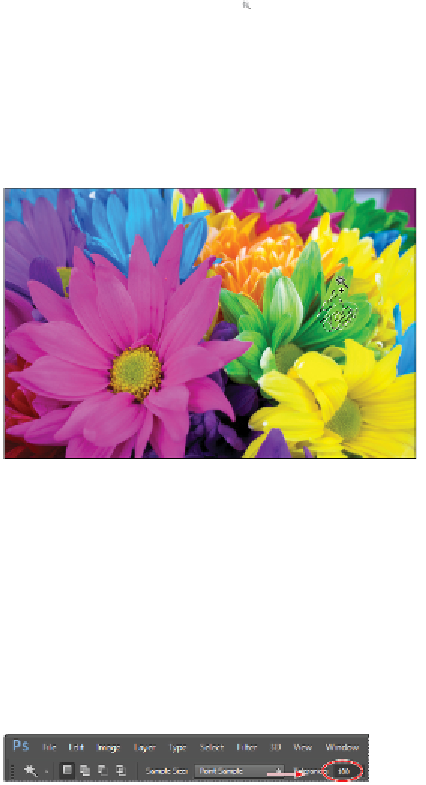
and open it in Photoshop; an image of very bright flowers appears.
2
Choose File > Save As, and in the File name text field, type
advps0304_work
. Make sure that you are
saving in the Photoshop (PSD) format and into the advps03lessons folder. Click Save.
3
Select the Magic Wand tool ( ) and click the green flower in the image. Depending upon the shade of
green you click, a range of the green colors is activated in the image. If you are at the default toler-
ance of 32, you should expect to have selected only a small range of the green color. To check your
tolerance, locate the Tolerance text box in the Options bar when you have the Magic Wand selected. If
necessary, change the value to 32 now.
4
Now press and hold the Shift key and click any green areas that were missed. By pressing and holding
the Shift key, you can add to the selection.
Add to your selection by Shift+clicking with the Magic Wand tool.
5
Press Ctrl+D (Windows) or Command+D (Mac OS) to deselect your selection.
6
Look back in the Options bar at the top; notice that the Magic Wand's tolerance is set to select 32
shades or levels of color. This is 32 out of 255, so a rather small selection is being made as a default.
7
Position your cursor over the word Tolerance (in the Options bar) and drag; notice that you can adjust
the value as though you were using a slider. You can use this method to increase and decrease values
in the Options bar. In our example, the value was changed to 100. Slide across until you reach the ap-
proximate value of 100, or type
100
into the Tolerance text field.
8
Using the Magic Wand, click again on the green flower; more of the green is selected.
Increase the Tolerance to 100.