Graphics Programs Reference
In-Depth Information
4
Choose File > Save for Web; the Save for Web dialog box appears. You will select a preset for this im-
age.
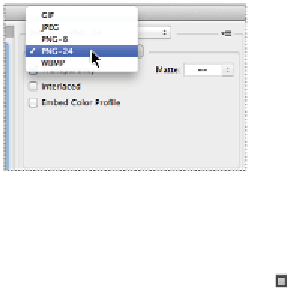
5
From the Preset drop-down menu in the upper-right, select PNG-24 and click Save.
Choose to save the images using the PNG-24 preset.
6
In the Save Optimized As dialog box, type the name
dj01
and make sure that you are saving into the
advps11lessons folder. Click Save.
7
Click the Stop recording button ( ) in the Layers panel. Your action has been recorded. You will now
test by using it on a different image file.
8
Choose File > Save, and then File > Close to close this file.
Playing your action
In this next section, you will play your action in another image file.
1
Choose File > Open and select the file named
advps1102.psd
located in your advps11lessons folder.
An image of another DJ appears. You will run the action one time to see how saving a file within an
action is resolved, and will then edit your action to complete the task correctly.
2
In the
advps1102.psd
file, make sure that the Busy Beat text layer is selected.
3
From the Actions panel, select My Text Effect and then click the Play selection button ( ) at the bot-
tom of the Layers panel.
The text layer has the correct effect applied, the file is reduced to 500 pixels, and it is saved as a PNG
file. The problem with this set of actions is that the script also recorded the name you used for the
PNG file that you saved in the previous exercise. By running the My Type Effect Action, you replaced
your initial image with this second image. In a production scenario, it would not be advantageous to
run fifty images through an action to be left with only the last image. In the next part of this lesson,
you will learn how to edit steps in a script.
4
Choose File > Revert to revert the file back to the original file.
5
Choose View > Fit on Screen. Keep the file open for the next part of the lesson.
Editing your script to change settings
In the next part, you will force the script to stop at the export stage so you can customize the file name.
1
Expand the My Text Effect action in the Actions panel and click the Toggle dialog box off/on button to
the left of the Export step.