Graphics Reference
In-Depth Information
Find the sphere that indicates the large hole
Orbit around your model (Alt + Left Click, drag your mouse) to identify
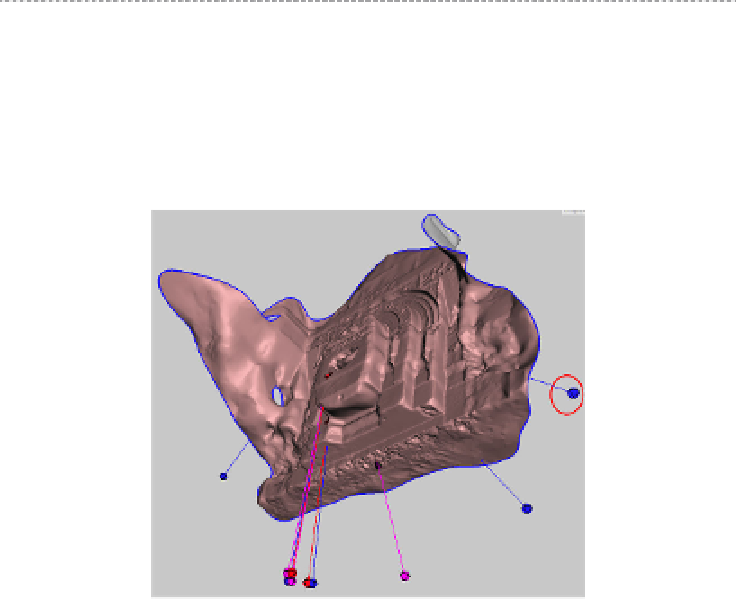
which blue sphere is directly on the blue outlined edge that represents
the large hole in the model that we want to cap. In the case of the model
shown, we want to cap the back of the fountain.
Take note of this particular sphere and make sure that you edit it last. In
the case of the fountain model, the sphere that indicates the large hole
is circled in the screenshot (see
Figure 9-29
). You want to close all of the
other minor holes first. Leave the circled sphere for last, we will get to it
later when we cap the back of the model.
When repairing meshes with large holes or missing areas, do
not click AutoRepair All as this can cause the program imme-
diately crash. In addition, you want to close the back of the
model ourselves to control how it is closed. You don't want a
big autorepaired blob, you want a nice, smooth cap.
Figure 9-29.
Model shown with sphere indicating large area of open mesh
Repair the problem areas
Clicking on a sphere will repair the problem. Right clicking on the sphere
will select the area and allow you to edit the selected part of the mesh.
When you right click, editing options will appear on the side of the screen.
First, left click on any red or magenta spheres first to close the non-
manifold areas and reconnect the components. The sphere and indica-
tor line will disappear after you click on it, indicating that the problem is
resolved.