Graphics Programs Reference
In-Depth Information
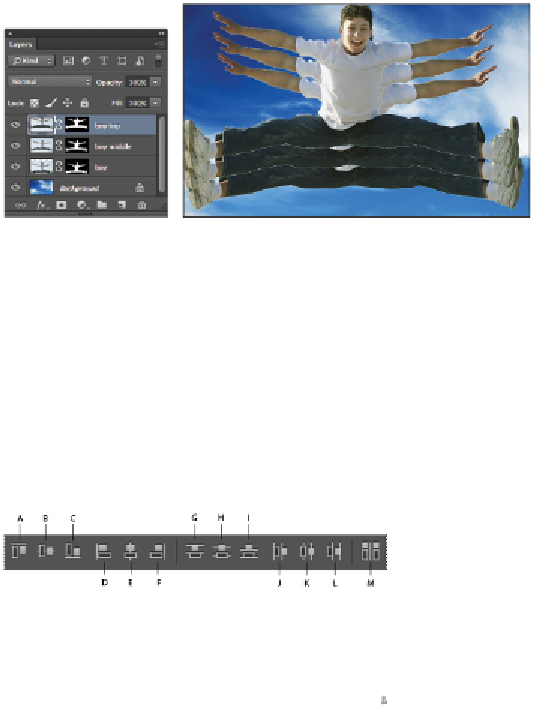
You now have three jumping boy layers.
6
Choose File > Save to save this file. Keep the file open for the next part of this lesson.
Aligning and distributing layers
The layers may not be evenly spaced or aligned with each other. This can be adjusted easily by using the
Align and Distribute features in Photoshop.
1
Select the boy layer and then Ctrl+click (Windows) or Command+click (Mac OS) on the boy middle
and boy top layers. All three layers become selected.
Note that when you have two or more layers selected, there are additional options in the Options bar to
align and distribute your layers.
A.
Align top edges.
B.
Align vertical centers.
C.
Align bottom edges.
D.
Align left edges.
E.
Align horizontal
centers.
F.
Align right edges.
G.
Distribute top edges.
H.
Distribute vertical centers.
I.
Distribute bottom
edges.
J.
Distribute left edges.
K.
Distribute horizontal centers.
L.
Distribute right edges.
M.
Auto-Align
Layers.
2
Choose the Align Horizontal Centers button ( ) and then the Distribute Vertical Centers button ( ). You
might or might not see a dramatic adjustment here; it depends on how you positioned the layers when
you created them.
3
Choose File > Save. Keep the file open for the next part of this lesson.
Applying filters to layers
Now you'll apply a filter to the boy and boy middle layers and then adjust their opacity.
1
Select the boy middle layer in the Layers panel.
2
Choose Filter > Blur > Motion Blur. The Motion Blur dialog box appears.
3
Type
-90
in the Angle text field, drag the distance slider to 150, and then click OK. You have created a
blur that makes it look like the boy is jumping up.