Graphics Reference
In-Depth Information
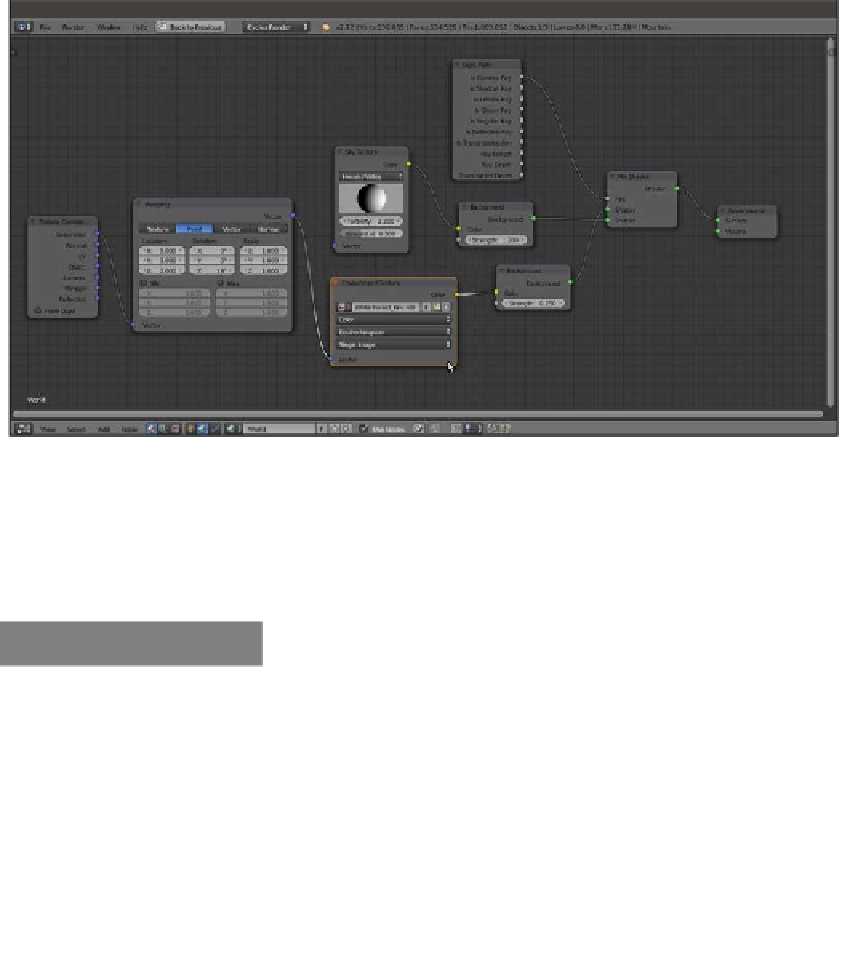
15. Go to the Environment Texture node and click on the Open button. Browse to the
texture
folder and load the
WinterForest_Env.hdr
image (it's a free, high-
dynamic-range image downloaded from the sIBL Archive at
http://www.hdrlabs.
com/sibl/archive.html
,
and licensed under the Creative Commons Attribution-
NonCommercial-ShareAlike 3.0 License).
16. Go to the Mapping node and set the Rotation value of Z to
19°
as shown in the
following screenshot:
The World network setting
17. Go to the Render window, and under the Sampling subpanel, set both the Clamp
Direct and Clamp Indirect values to
1.00
. Set the Samples to
10
for Preview
and
25
for Render. Under the Light Paths subpanel, disable both the Reflective
Caustics and Refractive Caustics items and set the Filter Glossy to
1.00
.
How to do it...
We are going to create the scene and materials by dividing the process into four stages:
F
Appending and grouping rock and snow shaders
F
Mixing the material groups
F
Creating a stencil shader
F
Adding an atmospheric perspective
So, let's start with the first stage.