Graphics Programs Reference
In-Depth Information
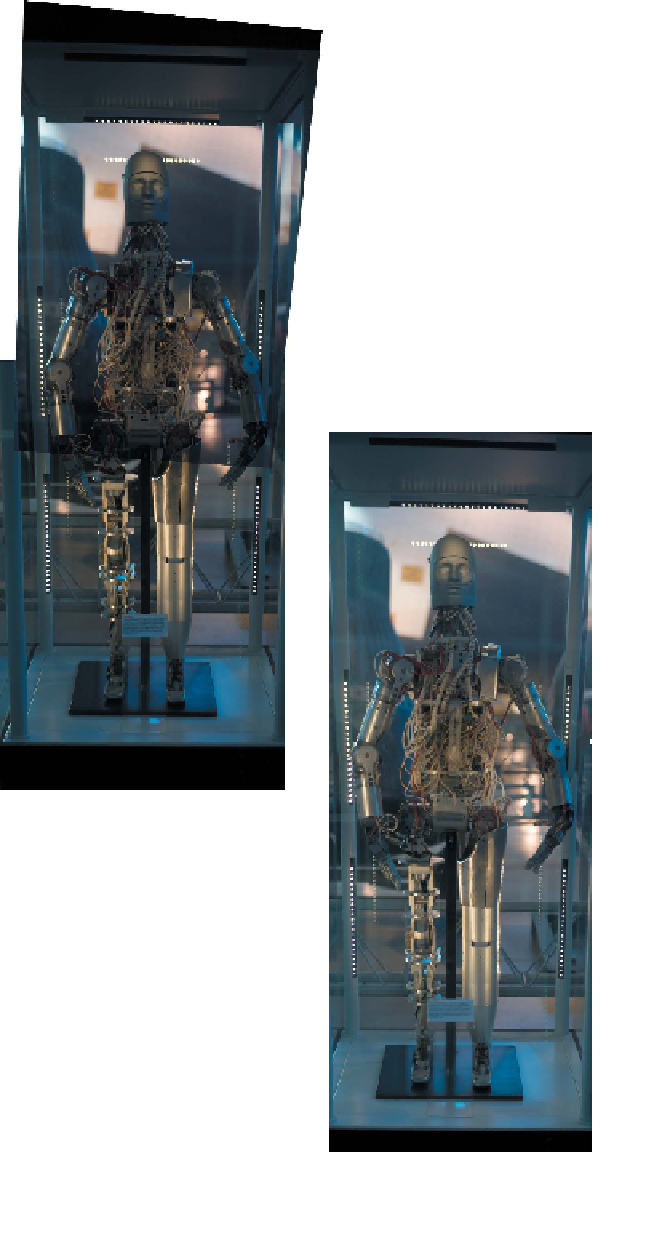
5.
Click OK. Photoshop opens
both images and aligns
them, and does a good job
(especially since the top
layer was taken at such an
angle). This alignment can
be refined even further.
6.
Make sure both layers are
selected in the Layers panel.
7.
Choose Edit > Auto-Align
Layers.
8.
Select the Auto option
to enable both Vignette
Removal and Geometric
Distortion options for
Lens Correction.
9.
Click OK. Photoshop
removes some of the distor-
tion in the glass case, giving
it a more rectangular shape.
The layers can be seam-
lessly blended together
using the Auto-Blend Layers
command. This applies
Layer Masks as needed
to each layer to mask out
exposure issues and create
a seamless composite.
10.
Choose Edit > Auto-Blend Layers, specify the Panorama
method, and click OK (be sure the Seamless Tones and Colors
check box is also selected).
11.
Crop the image as needed, adjust Levels, and flatten.