Graphics Programs Reference
In-Depth Information
2.
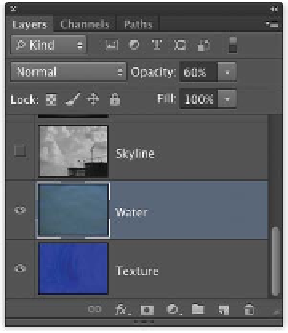
Tu r n on t he nex t layer, Wa t er, a nd cl ick it s
name to select the layer.
At the top of the Layers panel, you should
notice that the layer is set to 60% opacity.
Opacity is the opposite of transparency. A
layer or image that is 60% opaque is 40%
transparent.
There's a great shortcut for changing opacity
of a layer, but you must have a tool selected
that does not have its own transparency set-
tings (such as the Move or Marquee tools). To
change the opacity of a layer, type the cor-
responding number on the numeric keypad.
For example, press the 2 key for 20 % , the
5 key for 50%, and so on. If you want to be
even more specific, you can quickly type a
number such as 23 for 23% , and Photoshop
will adjust the layer accordingly.
3.
Tu r n on a nd s elect t he t h i rd layer, Sk yl i ne.
This layer introduces another layer feature:
blending modes. This layer is set to the Over-
lay blending mode.
In this case a grayscale image is used to add a
silhouette of a building. Blending modes com-
bine the contents of one layer with another
based on the luminosity or colors of the layer.
4.
Tu r n on a nd s elect t he fou r t h layer, Vig net t e,
and you'll see a similar technique employed
to add an area of focus to the image.
A good technique is to try changing the
blending mode before you make an opacity
change. This subtle change to your working
style will give you dramatic results.