Graphics Programs Reference
In-Depth Information
Step Three:
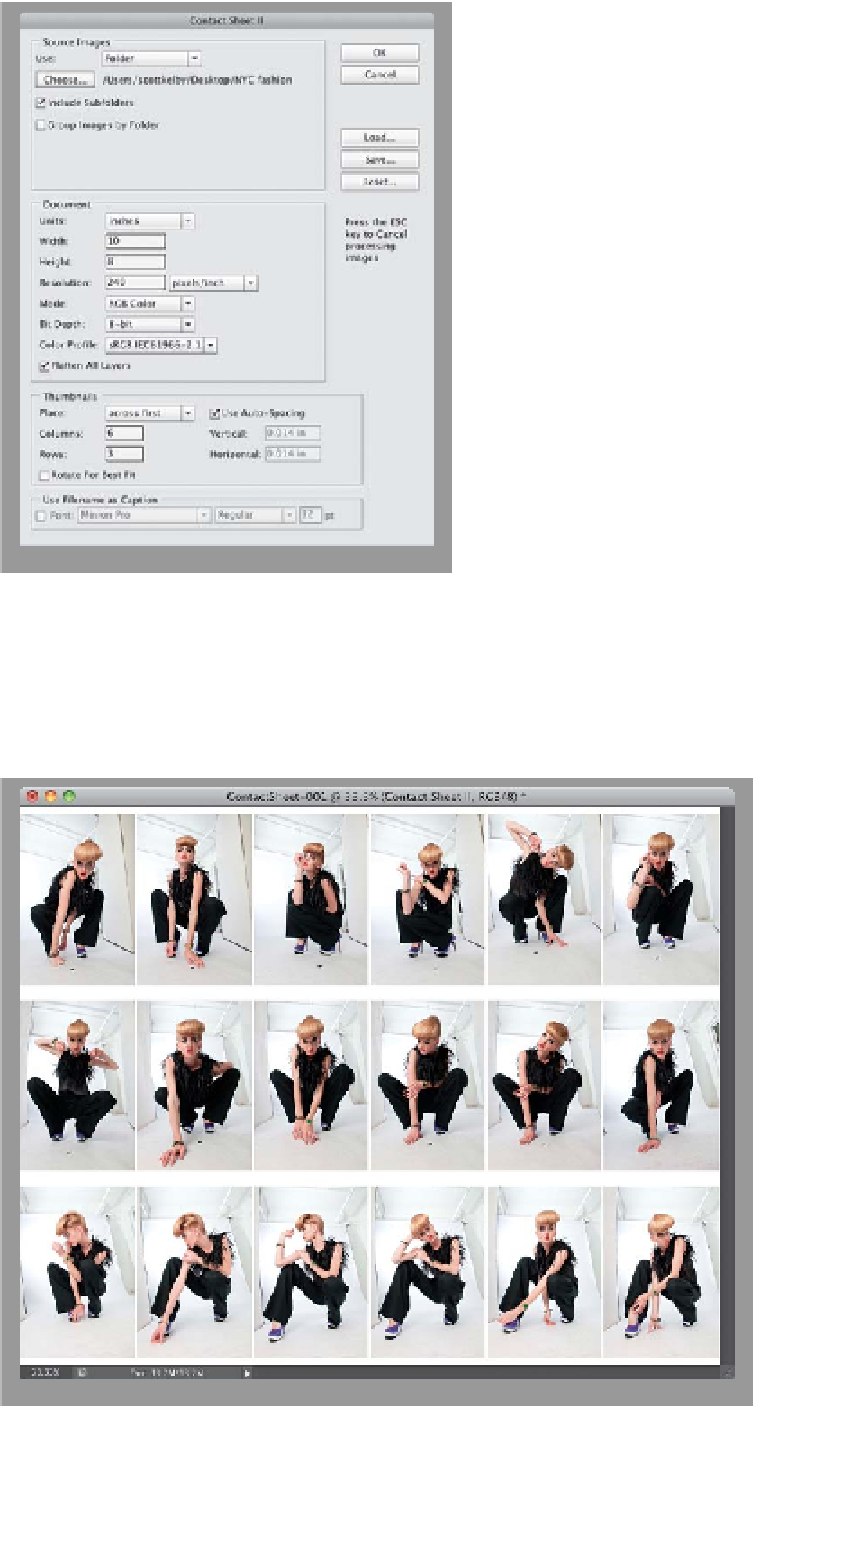
The next section down, Thumbnails, is
where you choose how many columns
and rows you want. In our example, we're
going to do six across, with three rows
deep. I generally leave the Use Auto-
Spacing checkbox turned on, because
it has Photoshop do the math to figure
out how to make the thumbnails in your
contact sheet as large as possible. How-
ever, if you turn that checkbox off, you
can type in what you'd like for your verti-
cal and horizontal spacing (the only time
I would do this is if I wanted more space
along the top and sides. As you'll see in
the next step, this one has them spread
out, so they're really close to the side
edges of the paper and pretty darn
close to the top and bottom).
Step Four:
The last section, at the bottom of the
dialog, is pretty important (even though
I don't have it turned on here), and that
is the option for the filename of each
photo to appear below the thumbnail.
If you're using this as a proof sheet for a
client, that's pretty important. My only
recommendation for this would be to
use a smaller font size than the default
12 point, which always seems too large
to me (especially if you have a long file-
name). Try 9 or 10 point, and I also would
try a sans serif font, like Myriad Pro (rather
than the default Minion Pro), simply be-
cause it looks better. Now, click the OK
button up top, and in about 20 or 30 sec-
onds, the contact sheet you see here
appears. This particular one uses 18
photos (6 columns by 3 rows), but if your
folder contains more than 18 photos, it
just keeps making more contact sheets
until every photo is accounted for.