Graphics Programs Reference
In-Depth Information
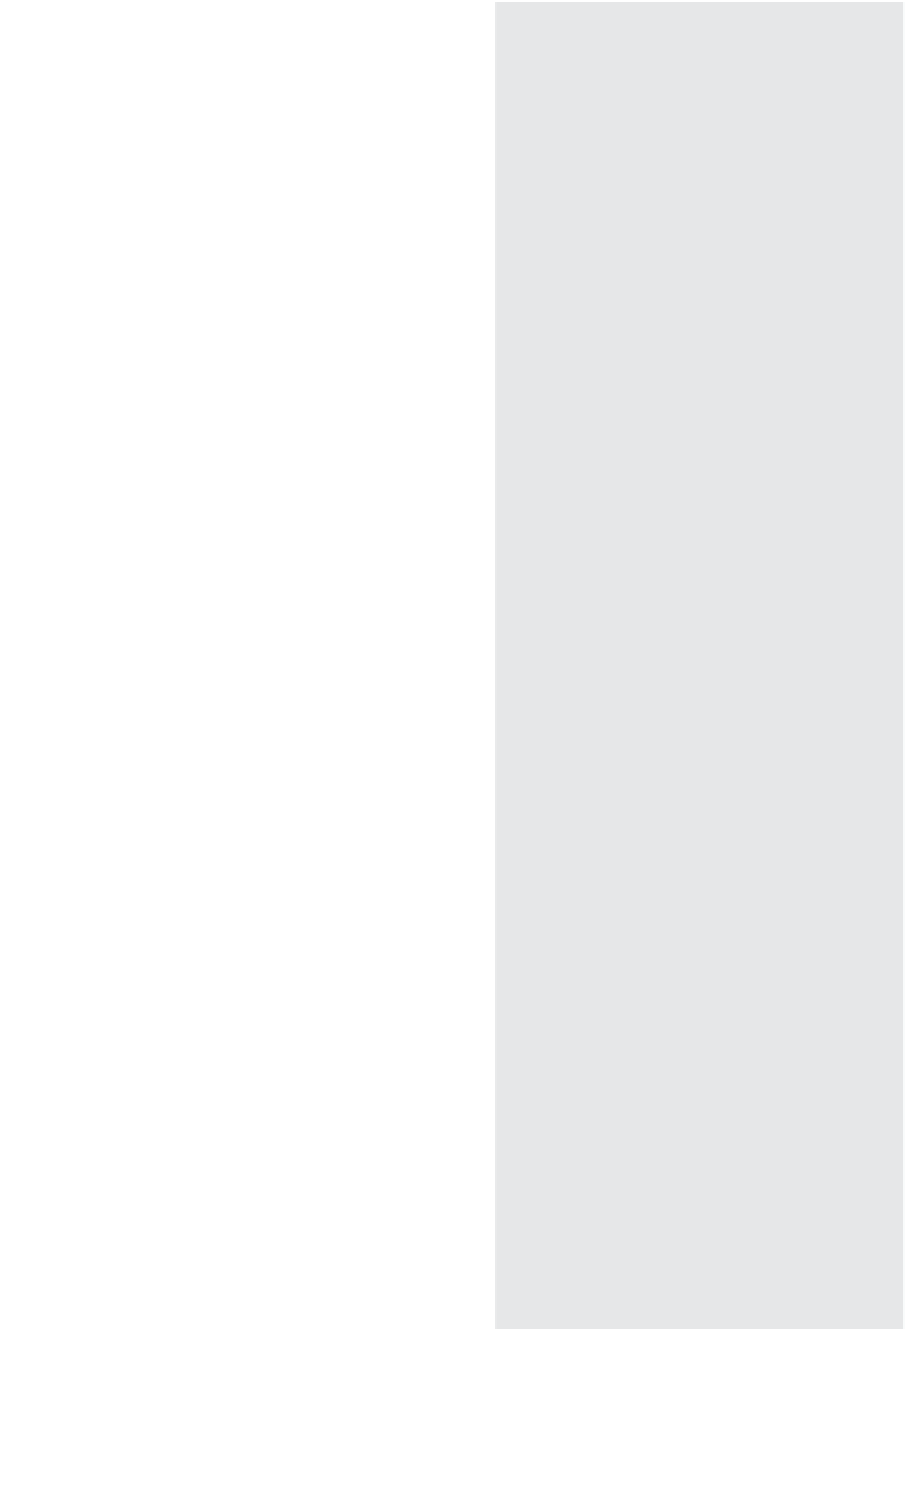
Using CS6 on a MacBook Pro?
Then you've probably experienced a weird
thing where all of a sudden your screen
rotates, or your image suddenly zooms
in (or out). It's because the track pad on
a MacBook Pro supports Gestures, which
are great for most things, but tend to drive
you insane when using Photoshop. You can
turn off Gestures by pressing
Command-K
(PC: Ctrl-K)
to bring up Photoshop's Pref-
erences, then click on Interface (in the list
on the left) and, in the Options section,
turn off the Enable Gestures checkbox.
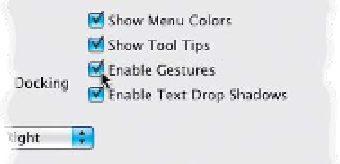
a duplicate or unlocked layer), then go
under the Select menu, and choose
Color
Range
. With the first Eyedropper tool on
the left (below the Save button), click on
the background once (not in the image
itself, in the mask preview right there in
the Color Range dialog), and then raise
the Fuzziness amount until it selects the
background. That usually does most of the
masking for me. Click OK, and now you can
quickly paint in any missing parts using the
Brush tool set to paint in black. This gives
you a mask of the background selection.
To make your mask a selec tion of your sub -
ject, make sure the mask is selected, and
press
Command-I (PC: Ctrl-I)
to Invert it.
ProPhoto RGB, but Photoshop's default
color space is sRGB, so since the two don't
match, it just puts that asterisk up top in
case you care).
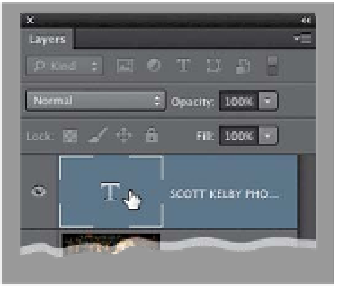
Tip for Finding Out Which Fonts
Look Best with Your Layout
This is a handy tip, especially if you're do-
ing poster layouts, and you want to find
just the right font to complement your
photo. Go ahead and create some type,
then double-click on the Type layer's
thumbnail in the Layers panel to select
Canceling an Adjustment Layer Edit
If you're working with an adjustment layer,
and you want to cancel your edit and re-
turn to the adjustment defaults, click the
curved arrow at the bottom of the Proper-
ties panel. If you don't want the adjustment
layer at all, you can quickly delete it by
clicking on the Trash icon, also at the
bottom of the panel.
all your type. Now, click your cursor once
in the Font field up in the Options Bar,
and you can use the
Up/Down Arrow
keys
on your keyboard to scroll through
all the installed fonts on your system,
and your highlighted type changes live
onscreen as you do.
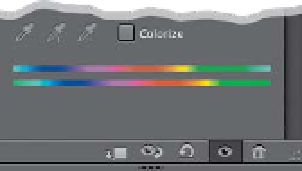
Change Your Background
Canvas Color
By default, the area around your docu-
ment is a dark gray color, but you can
choose any color you'd like by just Right-
clicking anywhere on that gray canvas
area and choosing
Select Custom Color
from the pop-up menu.
Refining Your Masks
Using Color Range
If you've created a layer mask, and want to
tweak it a bit, you can add the Color Range
feature as part of your tweaking arsenal.
I use this to quickly select images that are
on a white background. Try this: Click on
the Add Layer Mask icon at the bottom
of the Layers panel (you'll have to be on
What's That
*
Up in Your
Document's Title Bar Mean?
That's just letting you know that the image
you're working on has an embedded color
profile that's different from the one you
chose in Photoshop (for example, you'd
see this if you brought an image over from
Lightroom, whose default color space is