Graphics Programs Reference
In-Depth Information
This is only the second edition of this topic to include how to do soft proofing,
because I don't use—or recommend—soft proofing myself, and I don't want
to include techniques I don't really use. But, I have had so many people ask me
about it, I felt I had to include it. Just know that my advice about this is simple:
nothing beats a real proof. If you're serious about making great prints, make a test
print—soft proofing just gives you a hint of what it might look like. A test print
is what it actually looks like. Okay, I'm off my soap box. Here's how it's done:
Soft Proofing
in Photoshop
Step One:
Start by downloading the free color
profile from the company that makes
the paper you're going to be print-
ing on (see page 364 for where to
get these and how to install them).
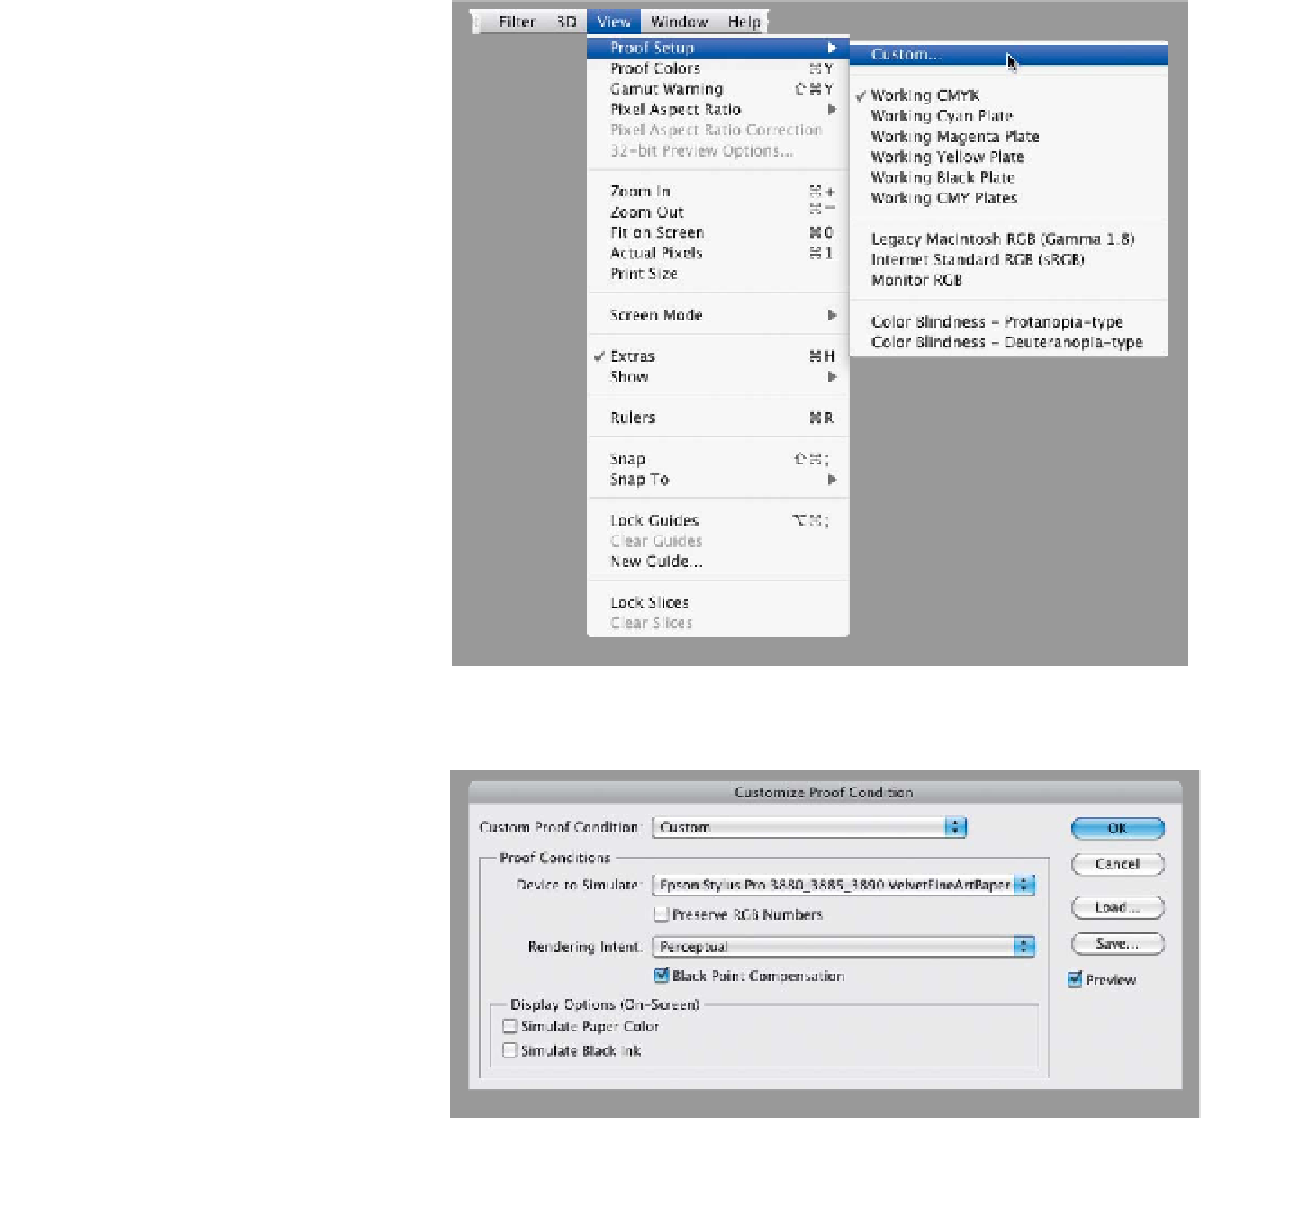
Open the image you want to soft
proof, then under the View menu,
under Proof Setup, choose
Custom
(as shown here).
Step Two:
When the Customize Proof Condition
dialog appears, from the Device to Sim-
ulate pop-up menu, choose the color
profile for the printer/paper combo you'll
be using (here, I've chosen an Epson
Stylus Pro 3880 printing to Velvet Fine
Art Paper). Next, choose the Rendering
Intent (see page 372 for more on this),
and make sure you leave Black Point
Compensation turned on. Down in the
Display Options (On-Screen) section,
leave Simulate Paper Color and Simulate
Black Ink both turned off. You can toggle
the Preview checkbox on/off to see a
before/after of the simulation of what
your print might look like with that profile
on that paper (though, of course, it can't
simulate how your sharpening might look
on different papers, just the color. Kinda).
Give it a try and then compare it with
a real test print, and you'll be able to
determine if soft proofing is for you.