Graphics Programs Reference
In-Depth Information
I don't normally include the same technique twice in the same book, but if you
read the HDR chapter, I included High Pass sharpening there, too, because it
High Pass
has become kind of synonymous with HDR processing. Of course, what I'm
concerned about is that you skipped over the HDR chapter altogether, and came
here to the sharpening chapter, and you'd be wondering why the very popular
High Pass sharpening technique (which creates extreme sharpening) wasn't
included in the topic. Well, it's so good, it is covered twice. :)
Step One:
Open a photo that needs some
extreme sharpening, like this photo
taken in India. Duplicate the Back-
ground layer, as shown here, by press-
ing
Command-J (PC: Ctrl-J)
.
Step Two:
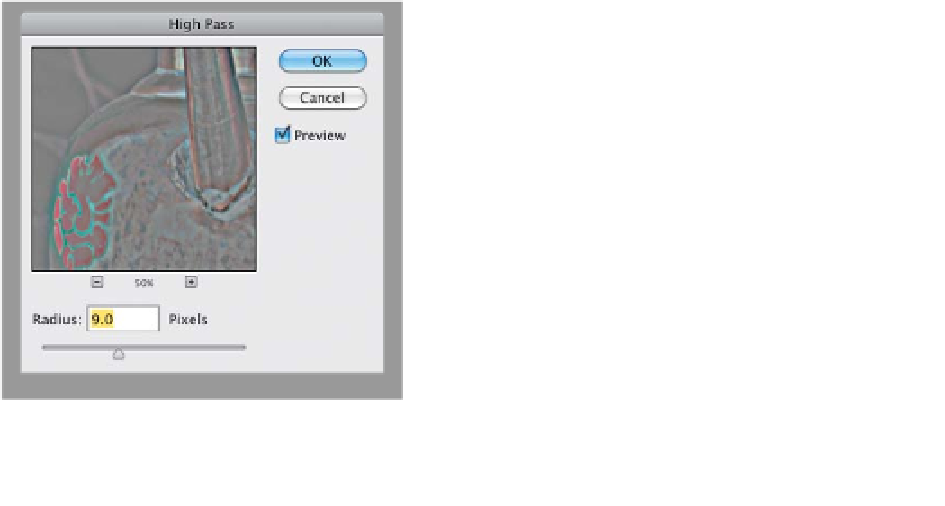
Go under the Filter menu, under Other,
and choose
High Pass
. You use this filter
to accentuate the edges in the photo, and
making those edges stand out can really
give the impression of mega-sharpening.
I start by dragging the Radius slider all
the way to the left (everything turns gray
onscreen), then I drag it over to the right.
For non-HDR images, I don't drag it all
that far—I just drag until I see the edges
of objects in the photos appear clearly,
and then I stop. The farther you drag,
the more intense the sharpening will be,
but if you drag too far, you start to get
these huge glows and the effect starts
to fall apart, so don't get carried away.
Now, click OK to apply the sharpening.
(Continued)