Graphics Programs Reference
In-Depth Information
Step Three:
With both images open in Photoshop,
get the Move tool
(V)
, press-and-hold
the Shift key, and then click-and-drag
the “no glasses” photo on top of the
“glasses” photo (as I did here). Now, if
you planned ahead and took shots with
and without the glasses (one right after
the other), then you can take a shortcut
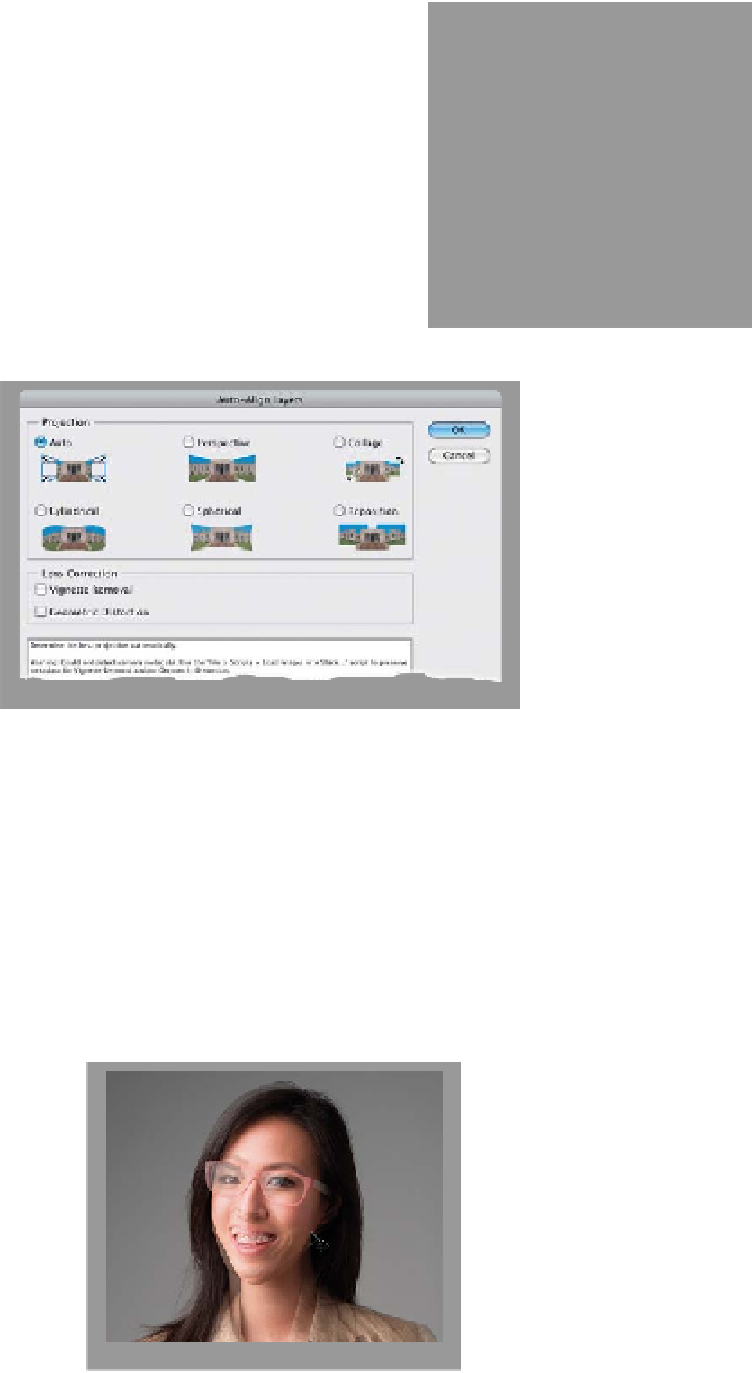
and use Auto-Align Layers to perfectly
match up the two shots. In the Layers
panel, Command-click (PC: Ctrl-click) on
each layer to select both (as shown here),
then go under the Edit menu and choose
Auto-Align Layers
. Leave the Auto op-
tion selected and click OK, and in just a
few seconds, they will be aligned right
on the money. Now, if you did all of this
“the right way” in the studio, then you
can jump to the second part of Step Six.
However, since the shots we're using here
were taken hand-held, about 10 minutes
apart, we can't use Auto-Align Layers (I
tried it and it distorted things really badly),
so we'll have to do it manually (another
reason why setting this up the right way
in the studio really pays off).
Step Four:
You need to be able to “see through”
the top layer, so you can see her eyes
on the bottom layer (that way, you can
line them up). So, start by going to the
Layers panel and lowering the Opacity
of the top layer to around 50% or 60%
(as shown here). Now, with the Move tool,
position the eyes on the top layer as close
as you can get to those on the bottom
layer (it won't match exactly, of course,
because her head is tilted differently. So,
at this point, just get as close as you can,
even though you'll still be quite a bit off,
as seen here at bottom. We're a little
closer, but still not there).
.