Graphics Programs Reference
In-Depth Information
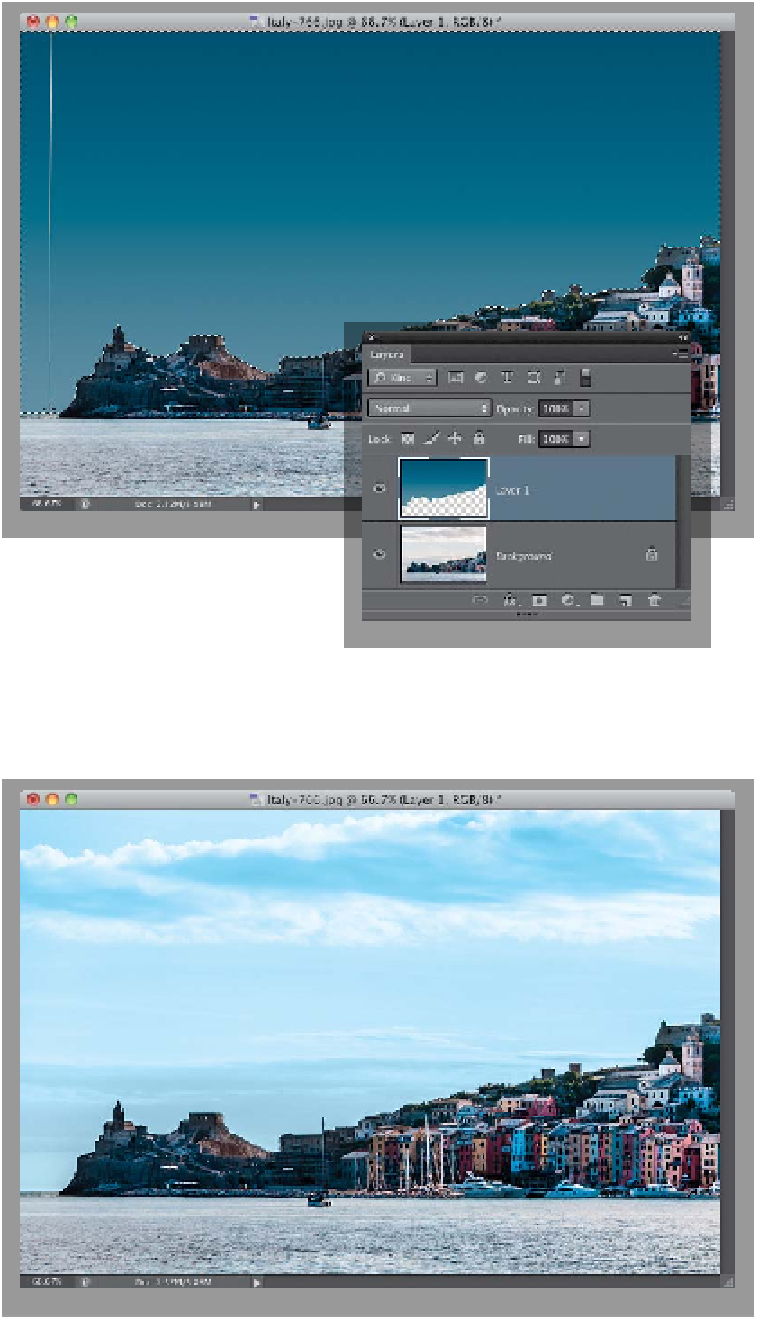
Step Four:
Go back to the original image, then go
to the Layers panel and add a new, blank
layer by clicking on the Create a New
Layer icon at the bottom of the panel,
then switch to the Gradient tool
(G)
, and
click-and-drag your gradient from the
top of the photo down to the bottom of
the sky (the light blue color should be at
the bottom of the gradient). This fills the
new layer with a gradient made up of
your Foreground and Background colors
(as seen here). For some images, you can
leave this gradient as is (or maybe just
lower the layer opacity a little to let it
blend in), but I think it usually looks a
little too fakey, which is why there are
two more steps.
Step Five:
First, press
Command-D (PC: Ctrl-D)
to Deselect, then go to the Layers panel
and change the layer's blend mode from
Normal to
Color
(shown here), just to see
how the color itself looks. In this case, it
looks a bit too cyan and fakey, so we'll
have to take it another step further (don't
worry—it's easy), but at least we can see
that we're in the ballpark (so to speak).
(Continued)