Graphics Programs Reference
In-Depth Information
In the previous projects, we looked at the very popular, hyperreal
tone-mapped look, which is definitely a creative, artistic use of HDR, but if
you're looking to simply expand the dynamic range of what your digital camera
can capture, without adding an “HDR look” to it, you'll be happy to know
that getting that look is even easier (though I recommend going through the
previous projects first, so you know what all the sliders do, because here
I'm just going to give you a recipe for photorealistic HDR images).
Step One:
Start by selecting your HDR-bracketed
images in Mini Bridge, then Right-click on
any one of those thumbnails and, under
Photoshop, choose
Merge to HDR Pro
.
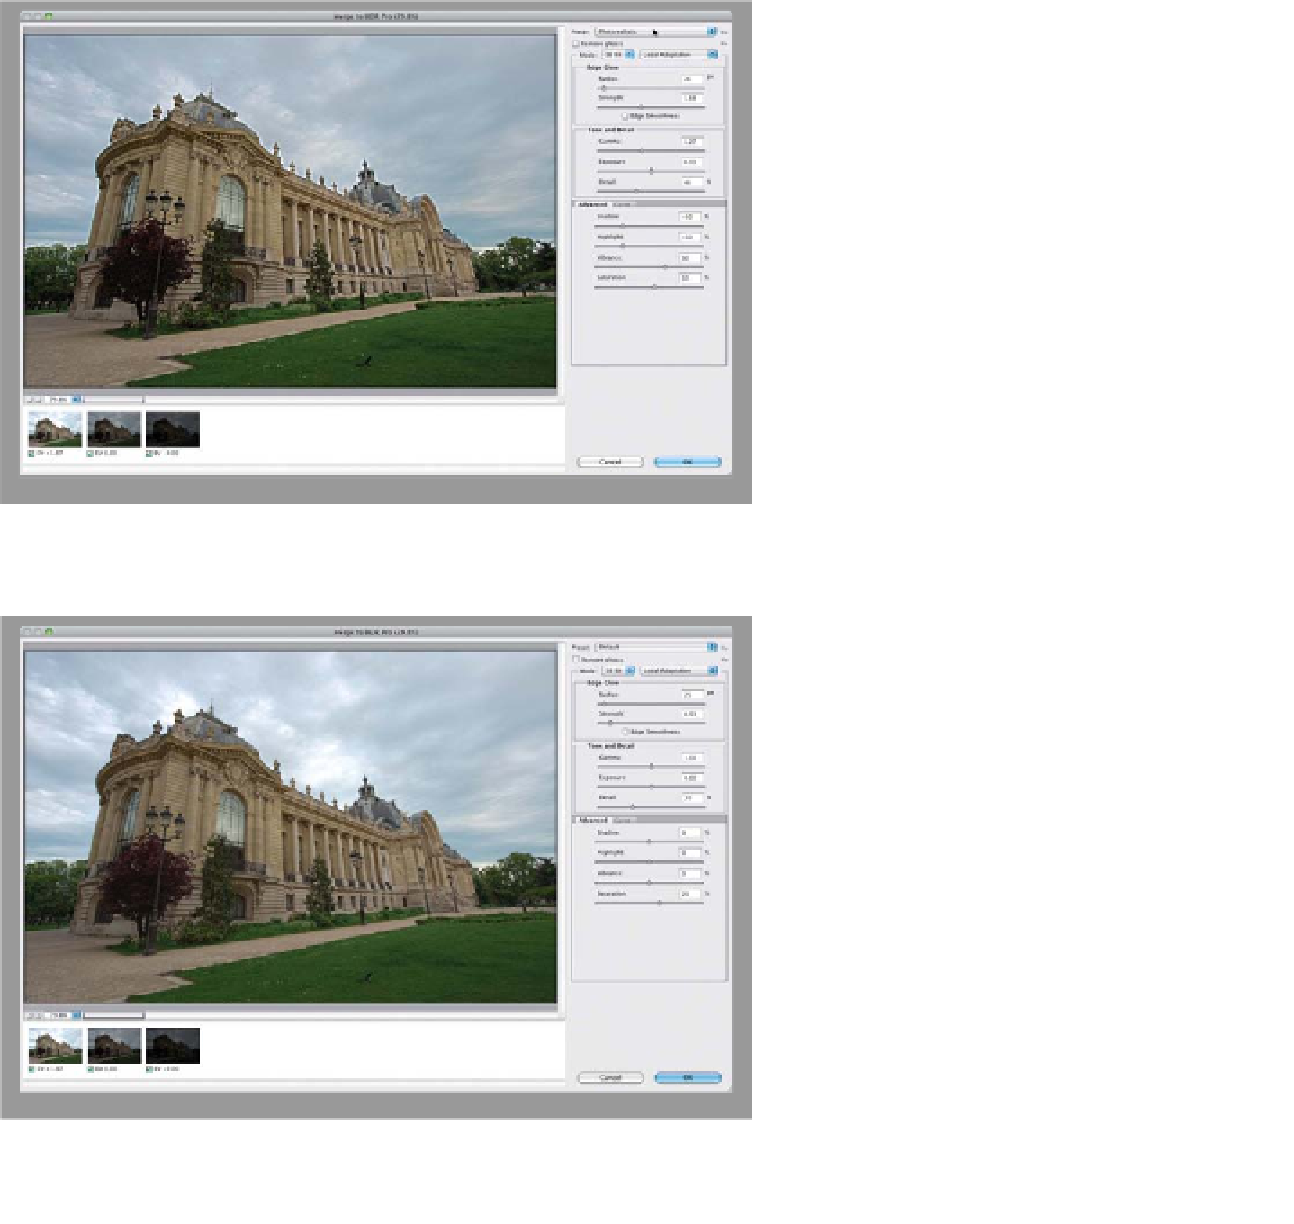
After a few moments, you'll see the Merge
to HDR Pro dialog appear (seen here). Go
ahead and choose
Photorealistic
from
the Preset pop-up menu at the top right,
and you'll find out (like I did) that the
Photorealistic preset doesn't look so
photorealistic sometimes. It actually looks
like it has an effect applied. In fact, if you
look at the side of this building, you can
see an edge glow around it. Nothing
screams HDR like an edge glow.
Step Two:
Surprisingly, the one that looks the most
photorealistic to me is the preset called
Default. So, choose
Default
from the Pre-
set pop-up menu, and take a look at the
image. The edge glow is gone, and look
at, for example, the grass, trees, and left
side of the building. You can now easily
see there is a bird on the lawn, and you
can see detail in the two trees on the left
and in the left side of the building—things
that were completely lost in the original
exposure, as you'll see on the next page.
(Continued)


