Graphics Programs Reference
In-Depth Information
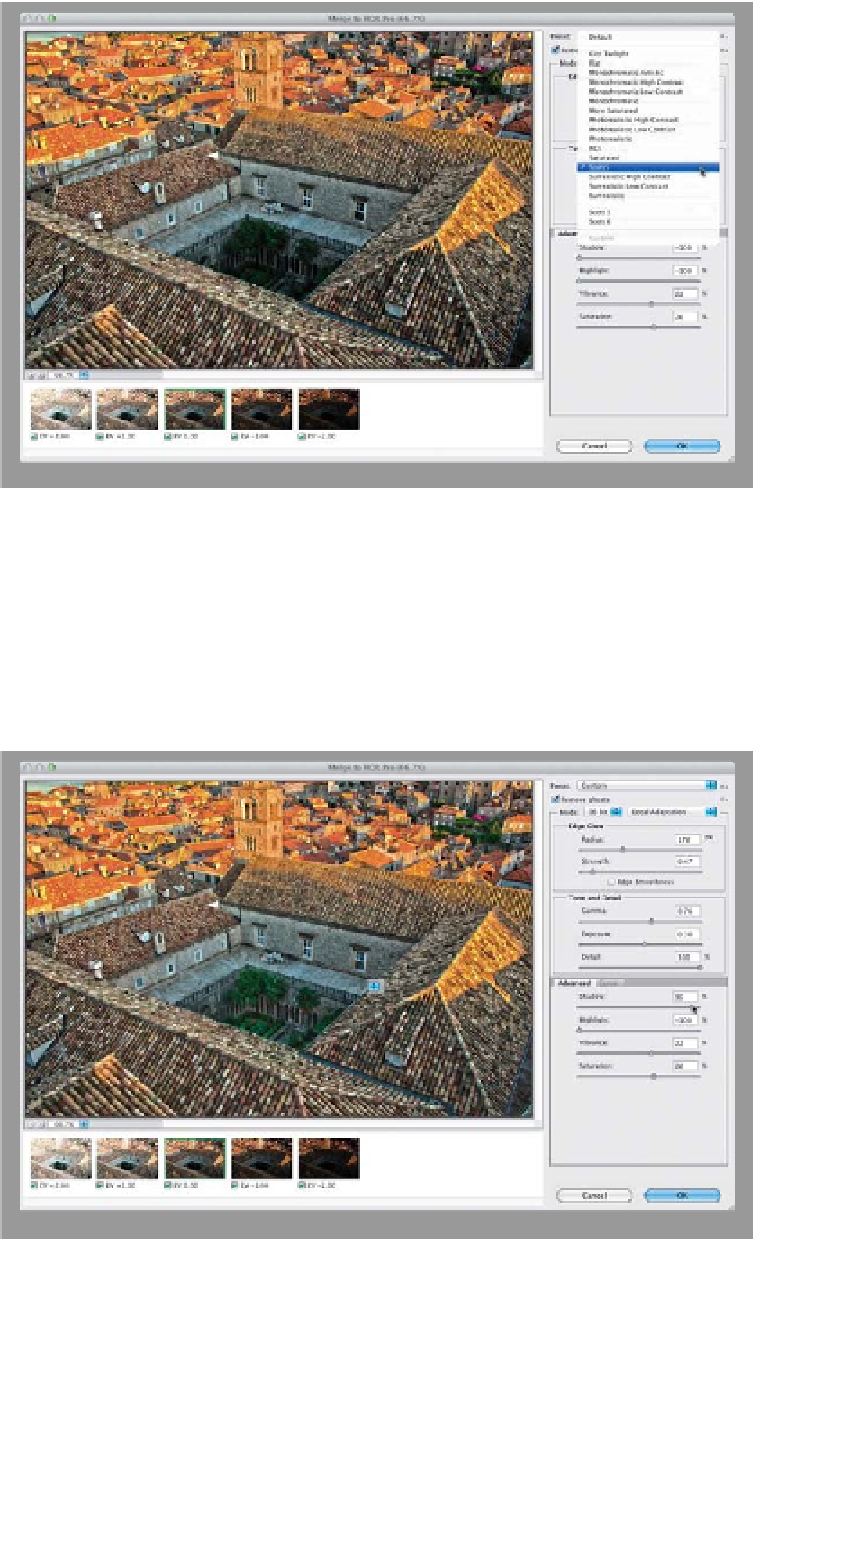
Step Three:
When Merge to HDR Pro came out,
I made a lot of fun of the presets that
came with it, because I couldn't find a sin-
gle image that they didn't look awful on
(none of them looked like the traditional
tone-mapped HDR images you see all
over the web). So, I set out to create an
HDR Pro preset that worked pretty con-
sistently for most of the images I tried
it on. It took a while, but I came up with
one, and I'm totally jazzed to say that
Adobe liked it enough that they includ-
ed it here, in Photoshop CS6. It's called
“Scott5” (it was my fifth try, and it took
a lot longer than it sounds). So, since
Adobe included it in their Preset menu,
all you have to do for this “Down & Dirty
HDR” technique is choose
Scott5
from
the pop-up menu (as shown here. My
buddy RC Concepcion had a couple of
his presets included here, as well. They're
called “RC5” and “City Twilight”).
Step Four:
With this preset, there's really only
one slider that I ever need to tweak and,
depending on the photo, it might not
even make a difference, but it's worth
a try. It's the Shadow slider. If part of your
HDR image looks pretty dark (like the
courtyard in the center does back in Step
Three), then you can open up those shad-
ows a bit by dragging the Shadow slider
way over to the right (as seen here). Now,
you can see the trees in the courtyard
pretty well. Click OK to process the
image (it's waiting time again).
TIP: Presets Can Look
Very Different
The Scott5 preset looks pretty good most
of the time, but I do find some images
where it doesn't look good and, in those
cases, I try out the other presets to see if
one gives me a better look. If they don't,
then turn to page 179.