Graphics Programs Reference
In-Depth Information
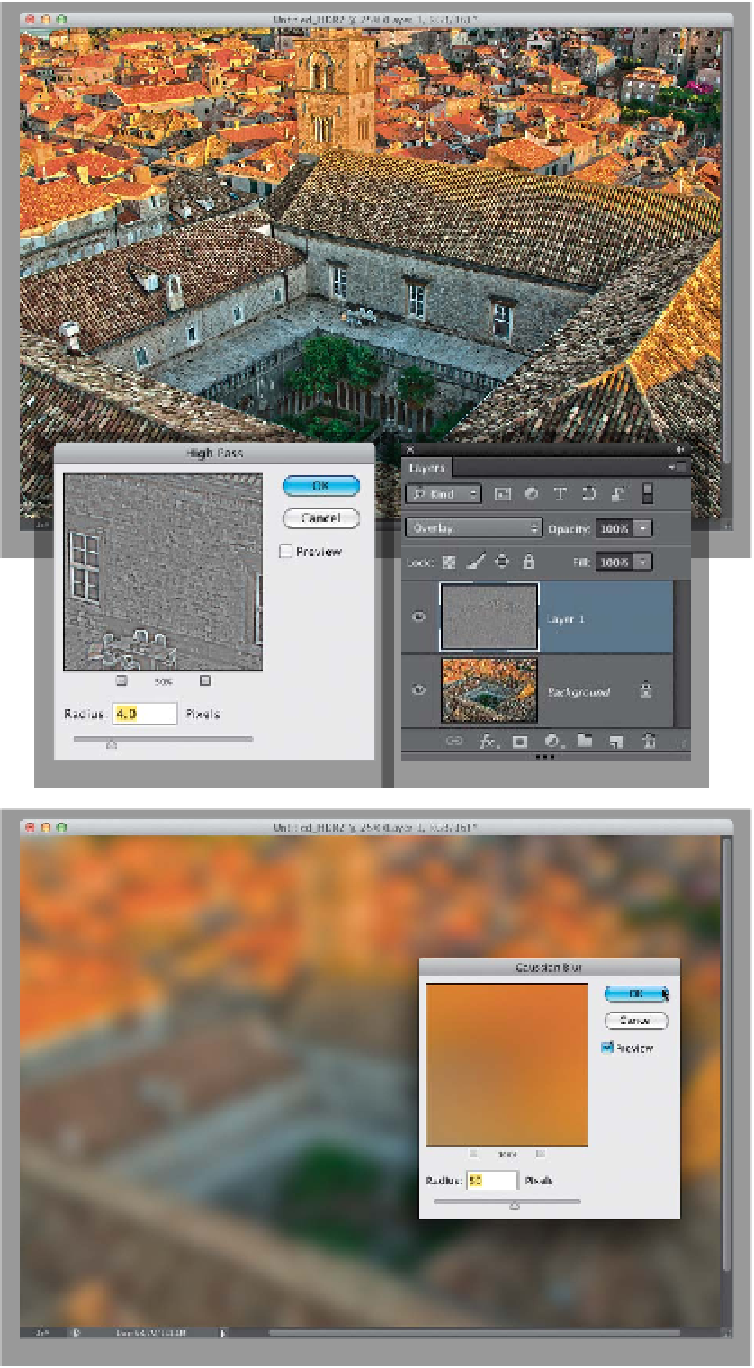
Step Five:
Once the image opens in Photoshop
(as seen here), it's time to add some
sharpening. High Pass sharpening is re-
ally popular on HDR images (rather than
Unsharp Mask), because it's kind of a
mega-sharpening and really enhances
the details that are already there (and
I think its look really suits HDR images).
Start by duplicating the Background layer
(press
Command-J [PC: Ctrl-J]
), then go
under the Filter menu, under Other, and
choose
High Pass
. When the High Pass
filter dialog appears (shown here), I gener-
ally enter 4 pixels and click OK for a nice
snappy sharpening. (
Note:
When the filter
dialog appears, it will turn your duplicate
layer solid gray with just an outline of the
edges in your image. That's normal.) Now,
to change this gray layer into sharpening,
go to the Layers panel, change this layer's
blend mode from Normal to
Overlay
(as
I did here), and now you see the sharpen-
ing. If you think it's too much, just lower
the Opacity of this layer until it looks
right to you.
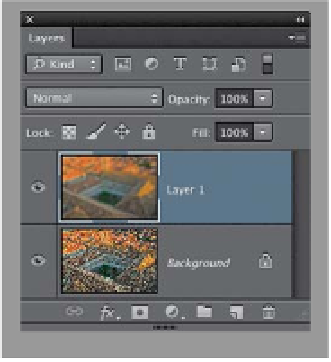
Step Six:
Another popular HDR “finishing move”
is to add a soft glow over the entire
image. It helps to take away some of the
harshness of an HDR image and gives
the image a little bit of a surreal feel to
it (in a good way, not in an over-the-top,
crazy surreal HDR way that drives people
nuts). First, choose
Flatten Image
from
the Layers panel's flyout menu to flatten
your layers, duplicate your Background
layer again, then go under the Filter menu,
under Blur, and choose
Gaussian Blur
.
Enter 50 pixels to blur the heck out of it,
and click OK (as shown here). Don't worry‚
you're not done yet.
(Continued)