Graphics Programs Reference
In-Depth Information
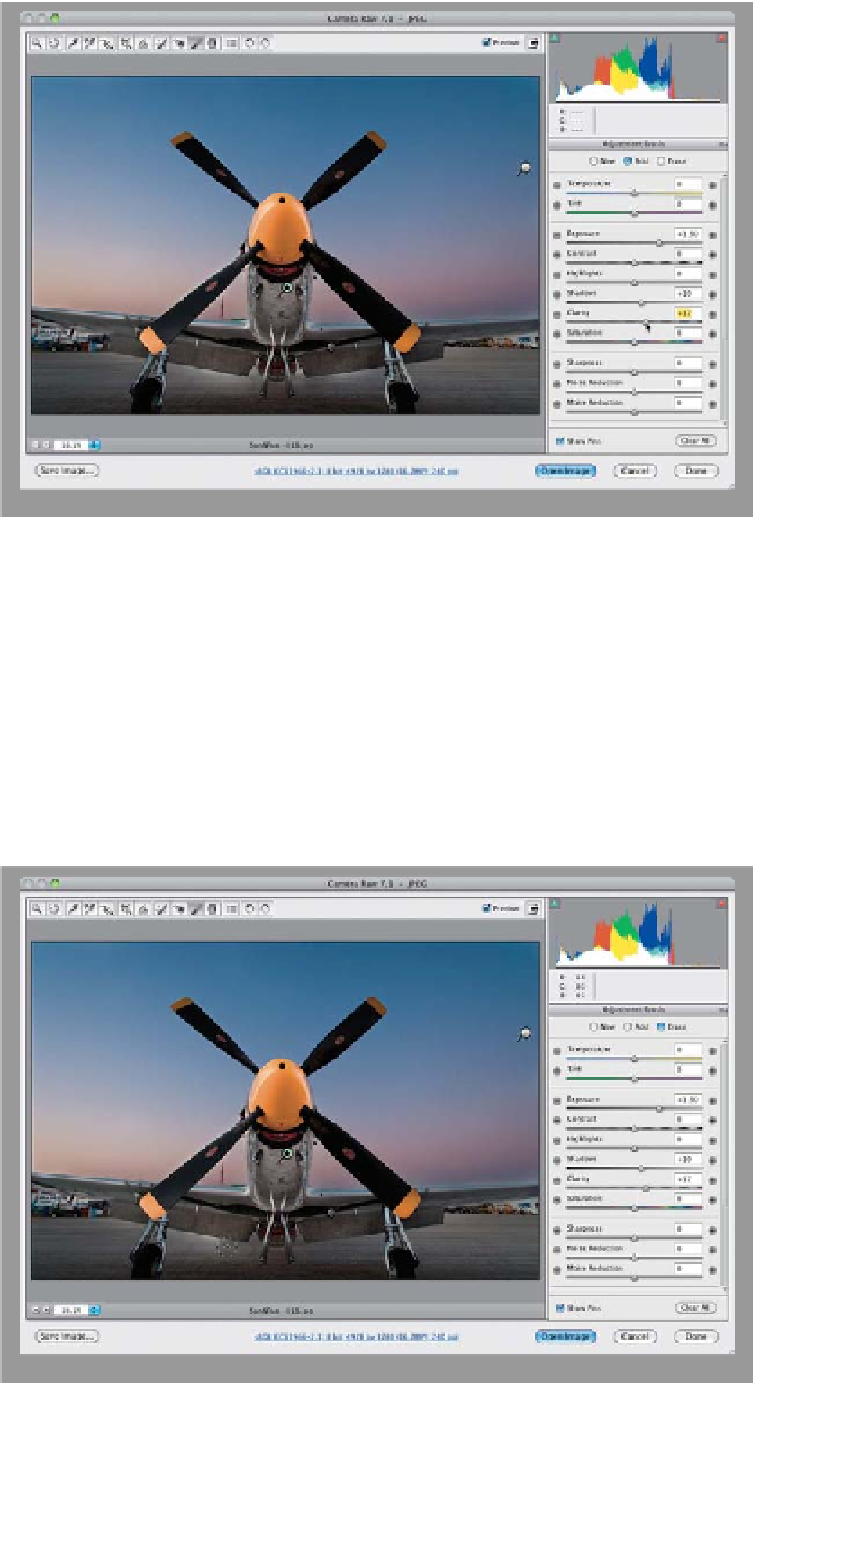
Step Nine:
Finish painting over the rest of the plane
(wings, propeller blades), and then let's
add some more “juice” to it by increasing
the Exposure amount a bit more (here,
I dragged it over to +1.50), then open the
shadow areas by dragging the Shadows
slider a little to the right (here, I went to
+10 ), a n d t h e n l e t 's a d d s o m e p u n c h b y
adding Clarity (drag it over to around +17).
Now the plane is really starting to pop,
but you can see that I let the little + in
the middle of the brush extend off the
bottom of the wings a bit, and it started
to brighten the tarmac (concrete runway)
below them, which looks bad. So, we'll
have to deal with that next.
TIP: Choosing What to Edit
If you have multiple pins and you drag a
slider, Camera Raw will adjust whichever
pin is currently active (the green-and-
black one). To choose which adjustment
you want to edit, click on the pin to se-
lect it, then make your changes.
Step 10:
If you make a mistake, or need to erase
something that spilled over, just press-
and-hold the
Option (PC: Alt) key
and
the brush switches to Erase mode. Now,
just paint the area where you spilled over
and it erases the spillover (as shown here).
You can also switch to Erase mode by
clicking on the Erase radio button at the
top of the Adjustment Brush panel. When
you switch this way, you get to choose
the Size, Feather, Flow, and Density of
the Erase brush (more on this in just a
moment), so it's at least good to click on
the radio button, choose your preferred
brush size (I set the Feather and Density
to 100% for this brush), then from that
point on, just press-and-hold the Option
key to get it when you need it.