Graphics Programs Reference
In-Depth Information
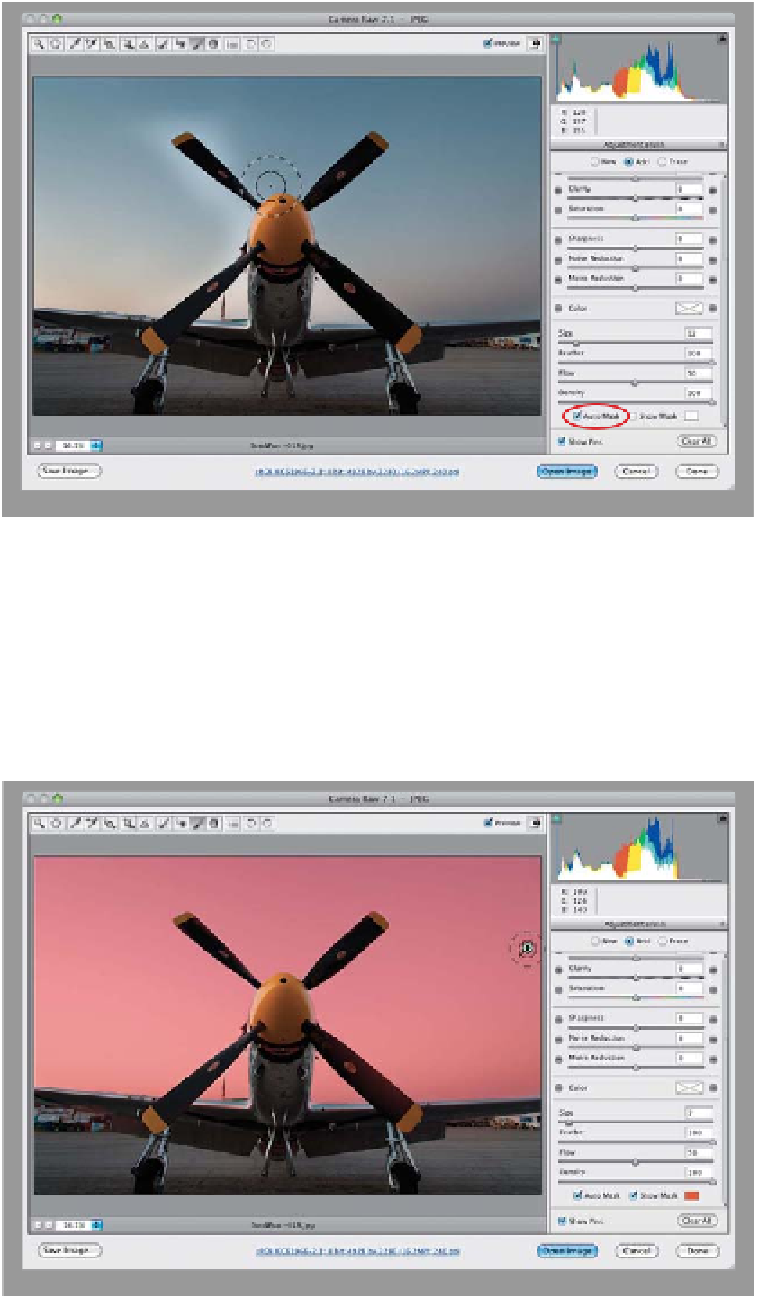
Step Five:
Okay, now that “glow” around the prop
and wings where we haven't painted
is starting to get on my nerves, so let's
deal with that before we tweak our set-
tings any more. When we're getting near
the edges of the prop and wings is when
you want to turn Auto Mask back on
(shown here). That way, you can paint
right up against them, filling in all those
areas, without accidentally painting over
the blades and wings. The key to using
Auto Mask is simple—don't let that little
+ (plus sign) inside the inner circle of
your brush stray over onto the blades or
wings, because that's what determines
what gets affected (if that + crosses over
onto a wing, it starts painting over the
wing). It's okay if the outer circle crosses
right over the wings and blades—just
not that + (see how the brush here is
extending over onto the cone in front
of the prop, but it's not getting darker?
That's Auto Mask at work).
Step Six:
So, how do you know if you've really
painted over the entire area you wanted
to adjust? How do you know whether
you've missed a spot? Well, if you turn
on the Show Mask checkbox near the bot-
tom of the panel, it puts a tint over the
area you painted (as seen here, where
I changed my tint color to red by clicking
on the color swatch to the right of the
checkbox), so you can see if you missed
anything. If you don't want this on all the
time, you can just hover your cursor over
any pin (which is what I'm doing here) and
it will temporarily show the masked area
for that pin. Now that you know where
you painted, you can go back and paint
over any areas you missed. If you want to
keep the mask turned on while you paint,
just press the letter
Y
on your keyboard.