Graphics Programs Reference
In-Depth Information
Blender gray color, but, as you can see in the properties win-
dow “Material” button, there are no control tabs displayed.
With the new object selected in the 3D window, in the prop-
erties window “Material” button, press “Add Material.” The
new object still displays in the 3D window as the same gray
color but now the “Material” button contains control tabs.
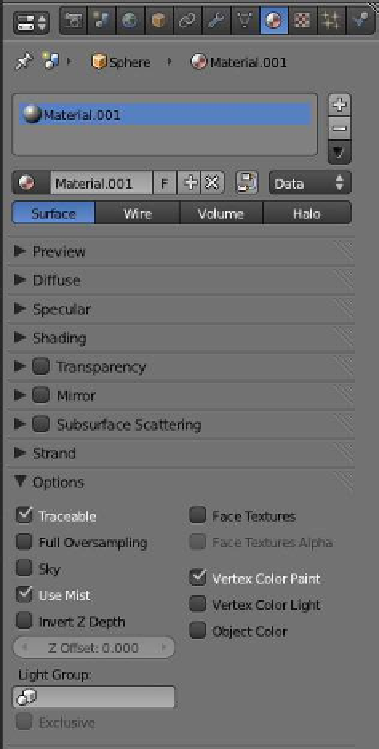
Go to the “Material” button - “Options” tab and tick
“Vertex Color Paint” (Figure 4.20). “Vertex Color Paint” tells
Blender to use the painted material instead of the base color
when you render an image. It must be ticked before the paint
color will render.
As vertex paint suggests, the process involves painting
vertices. The default cube in the 3D window only has eight
vertices, therefore it doesn't provide much scope for a dem-
onstration. Delete the cube and add a UV sphere. The default
UV sphere has 32 segments and 16 rings, which provides a
vertex at each intersection point. If you would care to count
the intersections, you will find there are a lot more vertices
in the sphere than the cube. You can also subdivide in edit
mode to add more vertices.
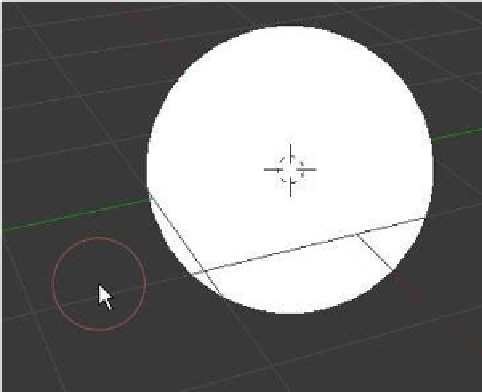
Change the 3D window to “Vertex Paint Mode”—the UV
sphere looks like a white disk and your 3D cursor changes to
an orange circle (Figure 4.21). The tool panel at the left of the
window displays with the “Brush” tab open. In the “Brush” tab,
you have a circular color picker for selecting the paint color
with a bar across the bottom that shows the color selected
(Figure 4.22). By default, the selected color is white. To paint,
click in the colored circle to select a color then, in the 3D win-
dow, click, hold, and drag the brush across the UV sphere.
Figure 4.20
UV sphere
Paint brush
Figure 4.21