Graphics Programs Reference
In-Depth Information
18.5 Compositing Nodes
Compositing nodes (or composite, for short) allow you to create and enhance an image.
The contents of the Blender scene can be the basis for the image or an image already saved
on the hard drive can be used. A presaved image can be combined with other images or
the Blender scene to create a new image. Unlike material and texture nodes, it is not neces-
sary to have an object selected in the 3D window or to have a material applied to an object.
Of course by default, any object added to a scene has the default material added to it even
though this does not display in the properties window until the “New” button is pressed.
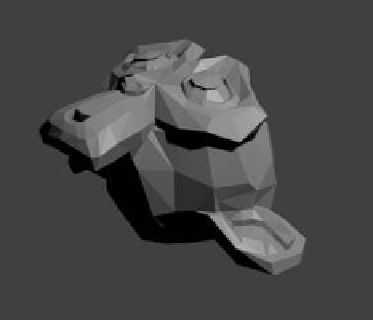
To demonstrate the activation of the compositing node editor, start with a new Blender
scene and delete the default cube. Add a monkey object and deselect the object in the 3D
window. Change the 3D window to node editor and select the compositing mode in the
window header. Tick “Use Nodes” and two nodes will display in the window: render lay-
ers and composite (Figure 18.26). Render an image (F12) to create a picture of the camera
view with the monkey (Figure 18.27). Remember that the monkey is not selected in the 3D
window and no material has been applied. Through the render layer and composite nodes,
Blender is rendering an image of the camera view in the scene. Rendering places the image
of the camera view into the nodes (Figure 18.28). Note that for Blender to render an image,
there must be a compositing node in the node editor. The following are two examples of
simple compositing node arrangements.
Figure 18.26
Figure 18.27