Graphics Reference
In-Depth Information
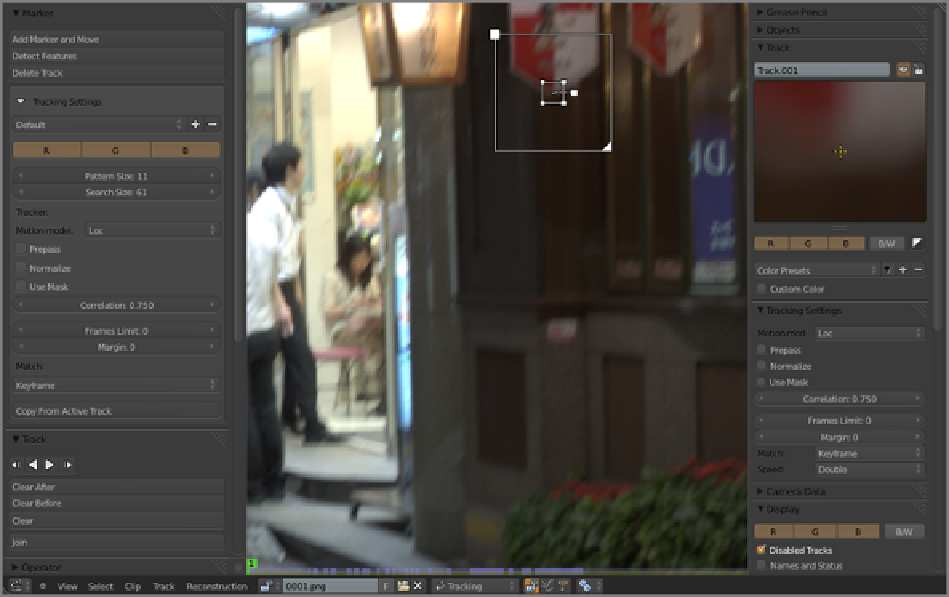
Figure 10-7
Adding a tracking marker
On the left side of the figure, in the Tool shelf, you can see a panel called Tracking Settings. These settings
determine the settings for any
newly placed
markers. The Tracking Settings on the Tool shelf do not affect ex-
isting selected tracking markers.
Once a marker has been created, you can adjust the settings for that marker (when it is selected) by using
the Tracking Settings panel on the Properties shelf, on the right side of the window. To repeat: The Tracking
Settings on the Tool shelf do not affect existing selected tracking markers.
The Tracking Settings are as follows:
Pattern Size/Search Size
These values determine the size of the pattern square and the search square when
the tracking marker is created. Once the marker is created, the size and shape of a model can be edited by
hand and may change automatically in some tracking conditions.
Motion Model
This selection sets the assumption the algorithm makes for how the pattern changes on the
screen. As the camera changes position from frame to frame, the appearance of the pattern area on the screen
changes.Ifthepatternisonaplaneperpendiculartotheviewofthecameraandthecameraonlymoveslater-
ally, only the pattern's location on the screen will change. But if the camera rolls from side to side or moves
in other ways, or if the pattern itself is on a plane that is not perpendicular to the camera, the pattern will
rotateorchangeinotherways.AverypowerfulsettinginthismenuisthePerspectivesetting,whichcorrects
for perspective changes for patterns on surfaces where the camera's movement creates significant parallax.
Prepass
This option activates a preprocessing step that slows down the tracking process but can greatly in-
crease its accuracy and ability to track. For footage with motion blur this is particularly helpful.