Graphics Programs Reference
In-Depth Information
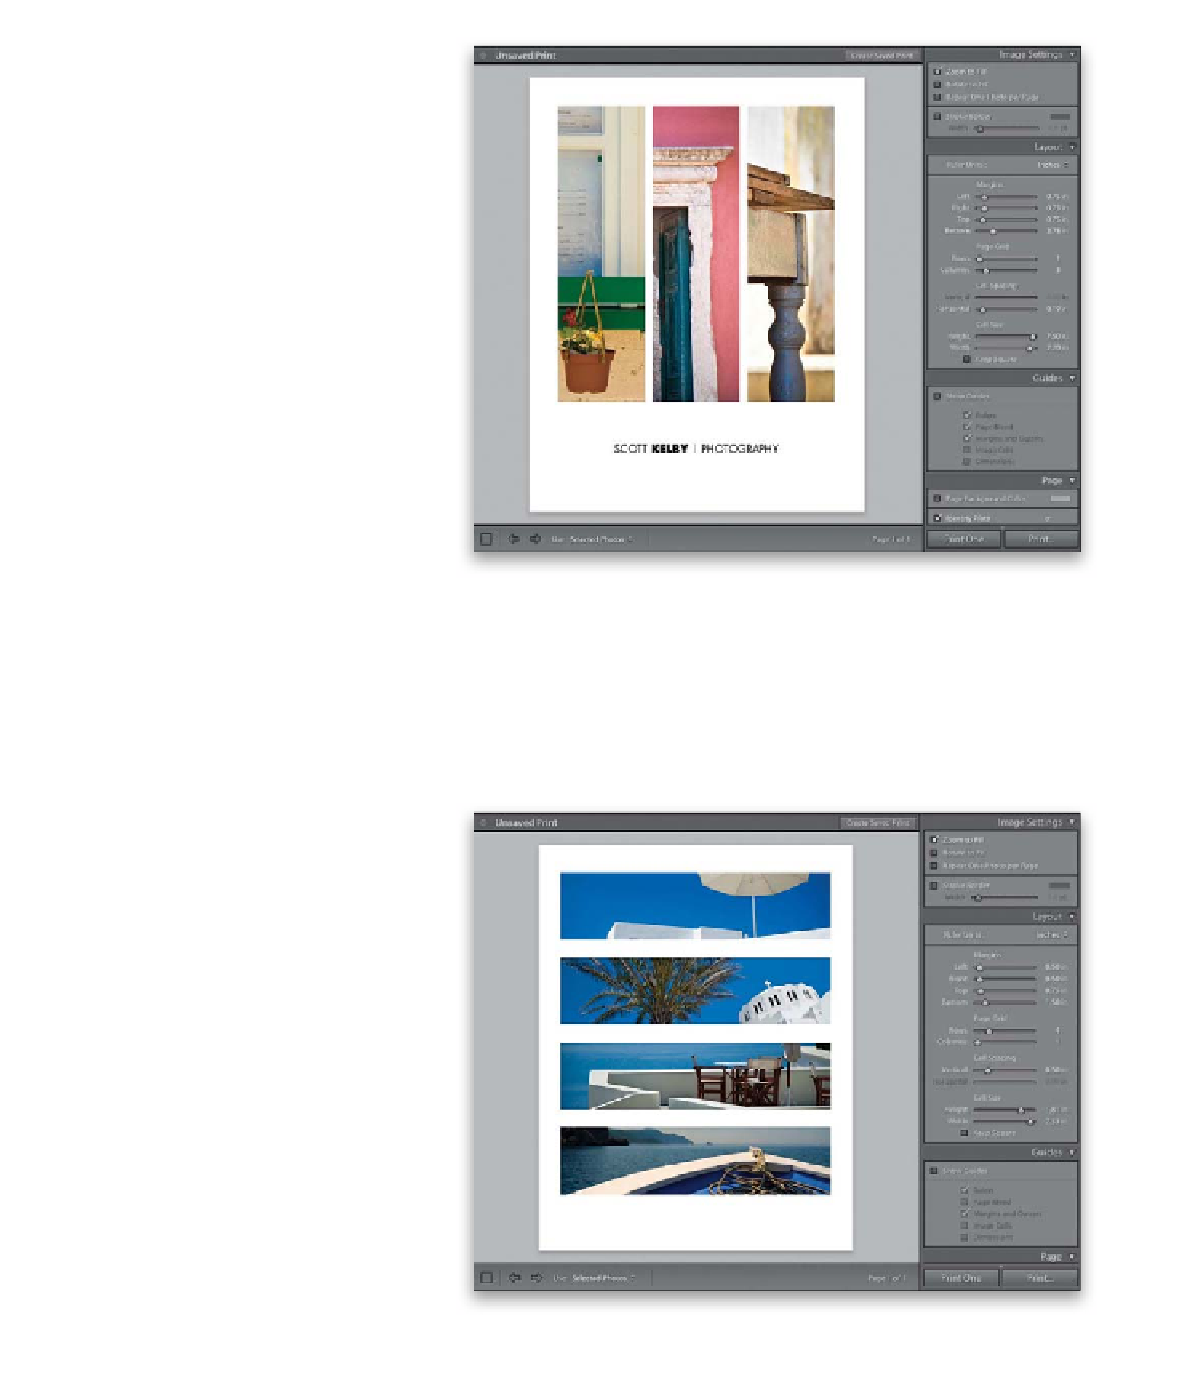
Step 13:
Let's wrap this section up with a few
examples of cool layouts you can create
using these Contact Sheet style layouts
(all based on an 8.5x11" page size, which
you can choose by clicking the Page Set-
up button at the bottom of the left side
Panels area). Start by going up to the Image
Settings panel and turning on the Zoom to
Fill checkbox. Now, go to the Layout panel,
under Page Grid, then change the number
of Rows to 1 and the number of Columns
to 3. Under Cell Size, turn off the Keep
Square checkbox. Drag the Left, Right,
and Top Margins sliders to around 0.75 in,
and (to leave lots of room for your Identity
Plate). Now, jump down to the Cell Size,
and for the Height, drag it to around 7.50 in,
and set the Width at only around 2.20 in,
which gives you very tall, narrow cells (as
shown here). Now, select three photos and
turn on the Identity Plate feature (in the
Page panel), make it larger, and click-and-
drag it so it's centered below your images,
giving you the look you see here (I also
turned off the Show Guides checkbox to
get rid of the distracting guides).
Step 14:
Now let's create four panorama layouts
in one photo (you don't need to use real
panos—this creates fake panos instantly
from any photo you select). Start by set-
ting your Rows to 4 and Columns to 1.
Then set your Left and Right Margins to
0.50 in, and set the Top to around 0.75 in
or 0.80 in. Set your Bottom margin to
1.50 in. Make sure the Keep Square check-
box is turned off (under Cell Size), then
increase your Cell Size Width to 7.33 in,
and your Cell Size Height to 1.81 in to
give you thin, wide cells. Now, set the
space between your fake panos using the
Vertical slider (set it to around 0.50) to
give you the layout you see here. I went
and clicked on four travel photos, and got
the instant pano layout you see here.