Graphics Programs Reference
In-Depth Information
Step 15:
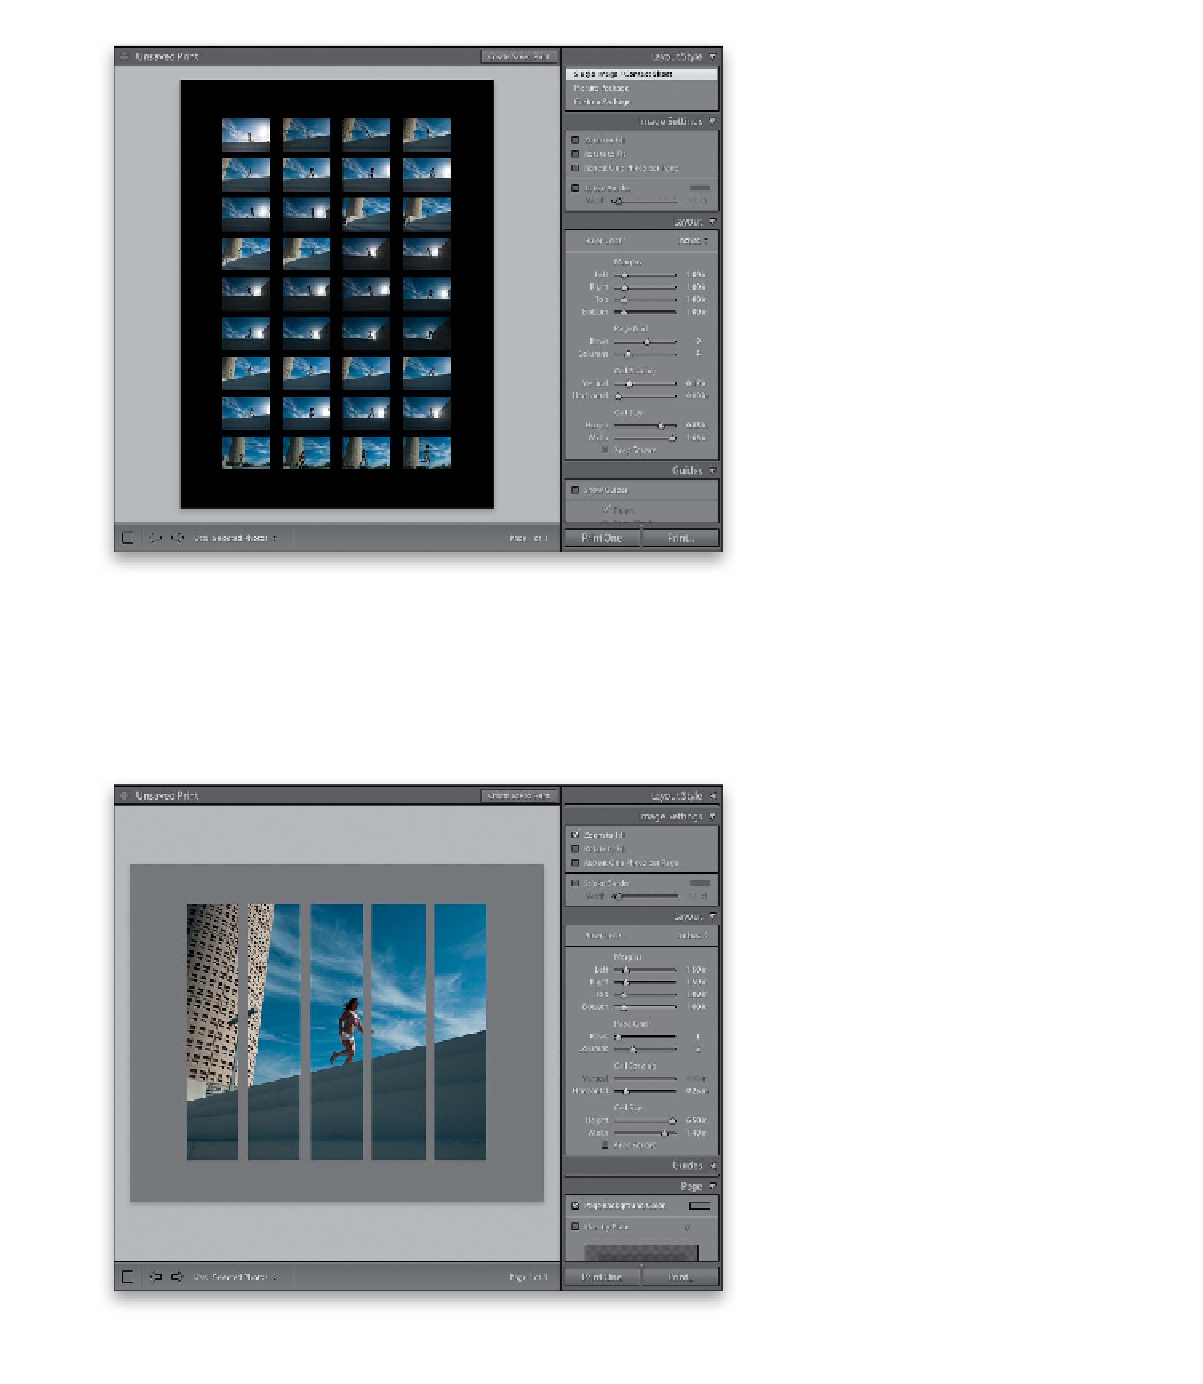
How about a poster, on black, with
36 wide images? Easy. Start by creating a
collection made up of only wide images.
Then go to the Image Settings panel and
turn off the Zoom to Fill checkbox. Go to
the Layout panel and set a 1-inch margin
all the way around the page, using the
Margins sliders. Now, set your Page Grid
to 9 Rows, and 4 Columns. Keep your
Horizontal Cell Spacing at 0 in, then put
just enough Vertical Cell Spacing to make
the space between the photos about half
the size of the horizontal spacing. Lastly,
head down to the Page panel, turn on the
checkbox for Page Background Color, then
click on the color swatch to the right of
it, and choose black for your background
color. If you have a white border, click on
Page Setup and choose borderless printing.
Step 16:
Okay, this one's kinda wild—one photo
split into five separate thin vertical cells.
Here's how it's done: You start by clicking
the Page Setup button (at the bottom
left), and set your page to be Landscape
orientation. Then Right-click on a photo
in the Filmstrip and choose Create Virtual
Copy. You need to do this three more
times, so you have a total of five copies
of your photo. Now, in the Image Settings
panel, turn on Zoom to Fill, then in the
Layout panel, set your Margins to 1.50 in
on the sides, and 1.00 in for the Top
and Bottom. For your Page Grid, choose
1 Rows and 5 Columns. Add a little Hori-
zontal Cell Spacing—around 0.25 in. Then
set your Cell Size Height to 6.50 in, and
the Width to only 1.40 in. In the Page
panel, turn on the Page Background Color
checkbox, click on the color swatch, and
change your background color to dark
gray. Select all five photos in the Filmstrip,
then you'll click-and-drag each of the five
images around inside their cells—drag-
ging left and right—until they appear to
be one single image (like you see here).