Graphics Programs Reference
In-Depth Information
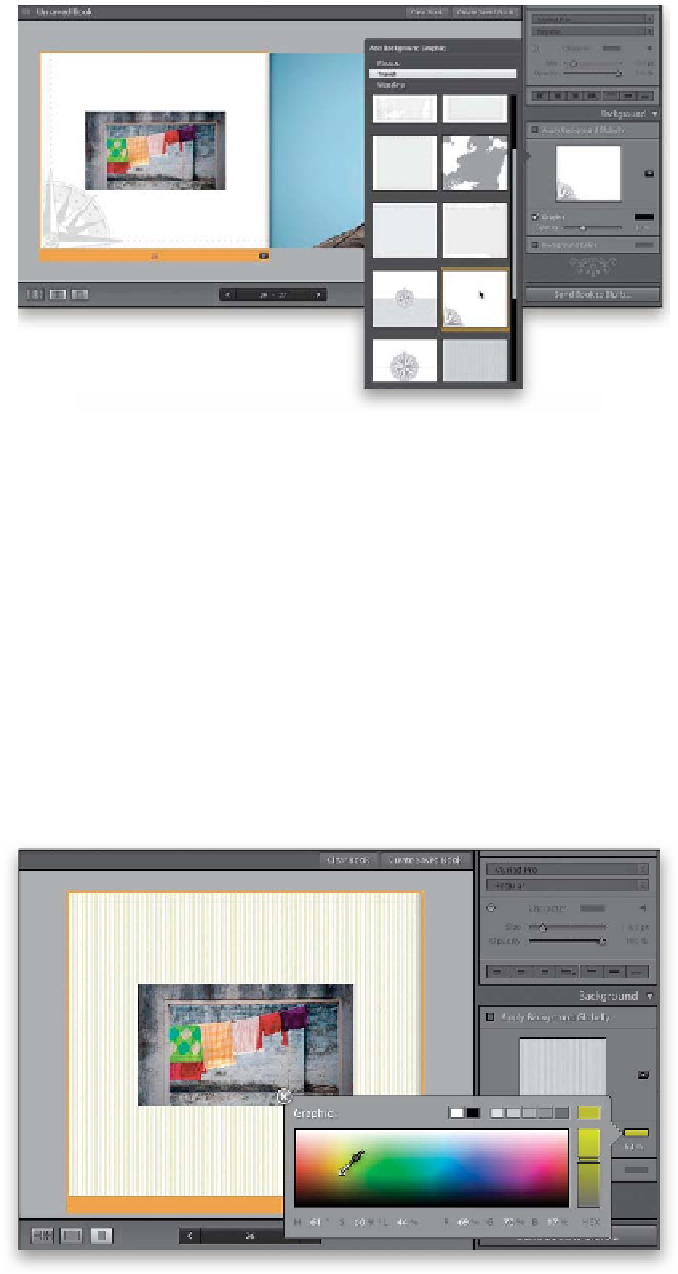
Step 15:
Okay, I am seriously sick of seeing this same
two-page spread (I'm sure you are, too),
so for the sake of variety (and our mutual
sanity), I'm changing pages for the rest of
this Background panel stuff (and resizing
the photo on the left page). Besides just
a solid color for your background, you can
also choose from a collection of built-in
background graphics, like maps and page
borders. To get to these, turn on the
Graphic checkbox in the Background
panel, then to the right of the square
background graphic well in the center of
the Background panel, click the little black
button to bring up the Add Background
Graphic menu, with a thumbnail list of built-
in backgrounds (as seen here). Just click on
the category at the top, then scroll down
to the graphic you want to use, click on
it, and it appears behind your photo (as seen
here). You can control how light/dark the
graphic appears using the Opacity slider
near the bottom of the panel.
Step 16:
If you want a pattern, rather than a
map or compass, you can add vertical lines,
and better yet—you get to choose their
color. (By the way, I switched to the Single-
Page View here, so you can see what's going
on a little better.) First, choose the lines
background from the pop-up menu (in the
Travel categor y), set its Opacit y (lightness or
darkness), then click on the color swatch to
the right of the Graphic checkbox to bring
up the Graphic color picker (seen here).
Choose any color you'd like for your graphic
(I chose a yellow color here, and I increased
the Opacity to 53% to make it more visible).
Continued