Graphics Programs Reference
In-Depth Information
Step Nine:
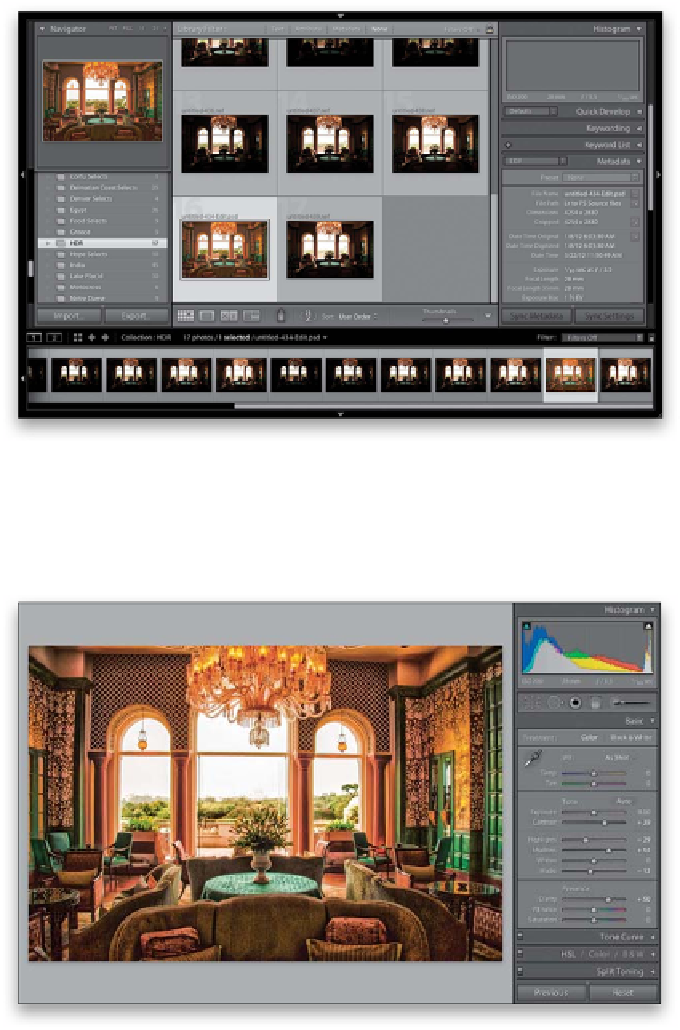
Jump back over to Lightroom and you'll
find that your new HDR file appears right
next to the original image files you used
to create it (as seen here). Now, let's start
tweaking it, so press
D
to take that image
over to the Develop module.
Step 10:
In the Develop module, we're going to
open up the shadows and increase the
contrast and texture quite a bit. Start by
increasing the Contrast to +39 to make
the image more contrasty, then lower the
Highlights to -29 (this helps it not look
quite so bright outside), and increase the
Shadows to +54 (which helps bring out
detail in the sofas, and well…pretty much
everything dark). To keep things from
looking washed out, drag the Blacks slider
a little over to the left to -13, and lastly, to
enhance the overall texture, increase the
Clarity amount to +50 (as shown here),
which really brings out the detail and helps
add to the HDR look of the image. Now,
take a look at the walls on the left and
right sides of the room. See how they look
a little bit bowed? That's from the wide-
angle lens I used to shoot this HDR, but
we can fix that in the next step.