Graphics Programs Reference
In-Depth Information
Step 11:
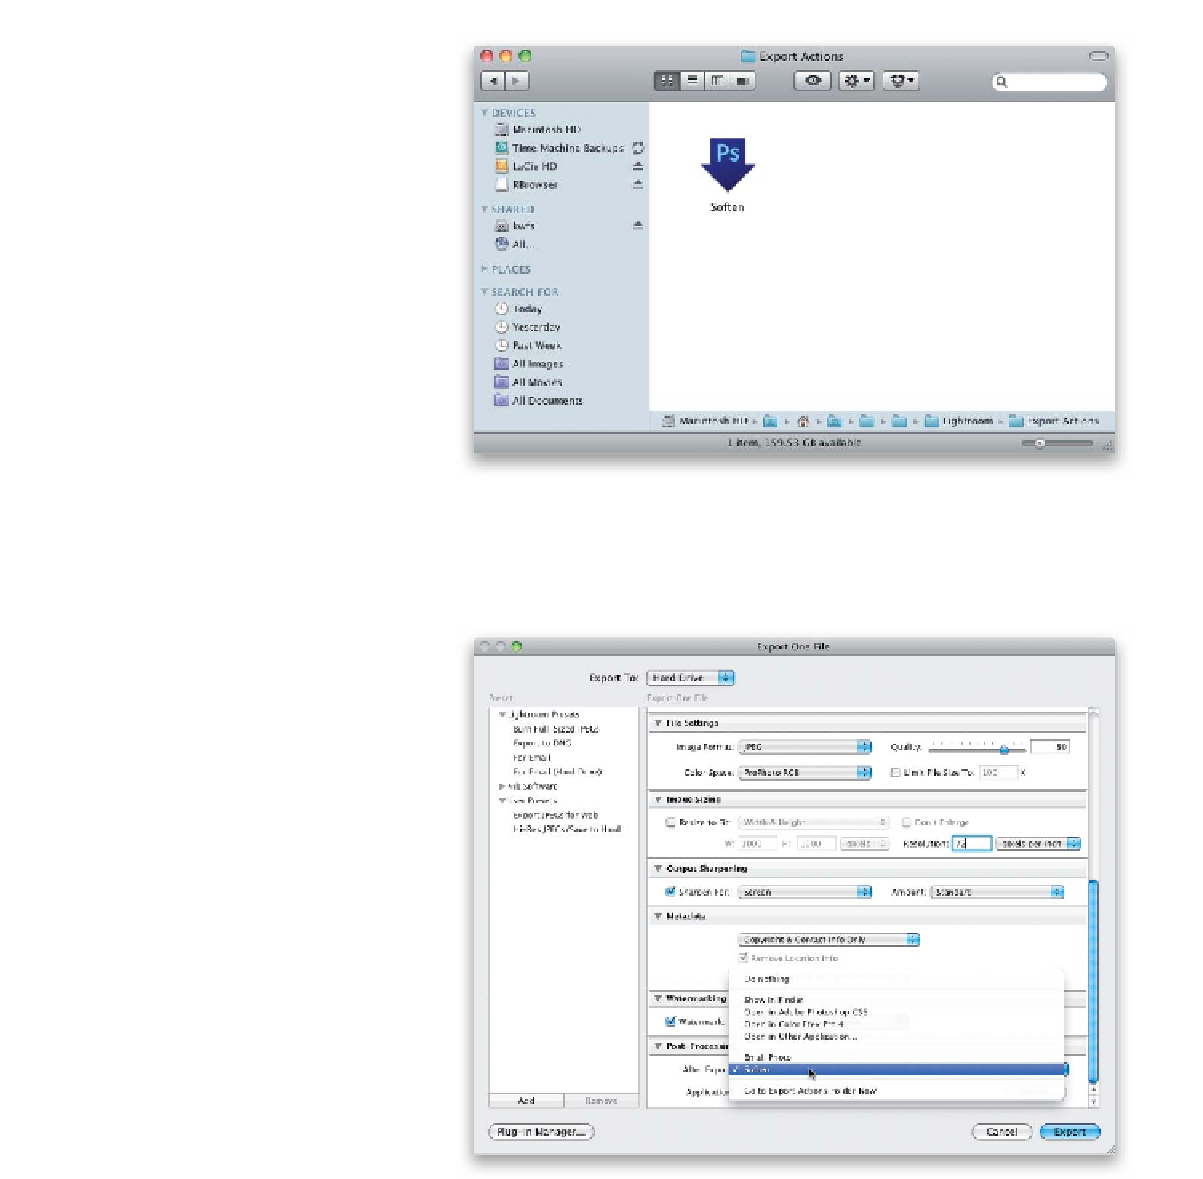
This takes you to the folder on your
computer where Lightroom stores Export
Actions (and more importantly, where
you can store any you create). All you have
to do is click-and-drag that Soften droplet
right into that Export Actions folder to add
it into Lightroom. Now you can close this
folder, head back to Lightroom, and click
Cancel to close the Export dialog (after all,
you only needed it open to get you to that
Export Actions folder, so you could drag
that droplet in there).
Step 12:
Okay, now let's put it to work: In Light-
room's Grid view, select the photo (or
photos) you want to have that effect
applied to, then press
Command-Shift-E
(PC: Ctrl-Shift-E)
to bring back the Export
dialog. From the Preset section on the left,
click on the right-facing triangle to the
left of User Presets, and then click on the
Export JPEGs for Web preset we talked
about creating in Chapter 9 (if you didn't
create that one, go ahead and do it now).
In the Export Location section, click on the
Choose button and select the destination
folder for your saved JPEG(s) (if you want to
change it). Then, in the File Naming section,
you can give your photo(s) a new name, if
you like. Now, in the Post-Processing sec-
tion at the bottom, from the After Export
pop-up menu, you'll see Soften (your
droplet) has been added, so choose it (as
shown here). When you click Export, your
photo(s) will be saved as a JPEG, then
Photoshop will automatically launch, open
your photo(s), apply your Soften Finishing
Effect, then save and close the photo(s).
Pretty slick stuff!