Graphics Programs Reference
In-Depth Information
Sooner or later, you're going to run into a situation where some of the
more contrasty edges around your subject have either a red, green, or more
likely, a purple color halo or fringe around them (these are known as “chromatic
aberrations”). You'll find these sooner (probably later today, in fact) if you have a
really cheap digital camera (or a nice camera with a really cheap wide-angle lens),
but even good cameras (and good lenses) can fall prey to this problem
now and again. Luckily, it's easy enough to fix in Lightroom.
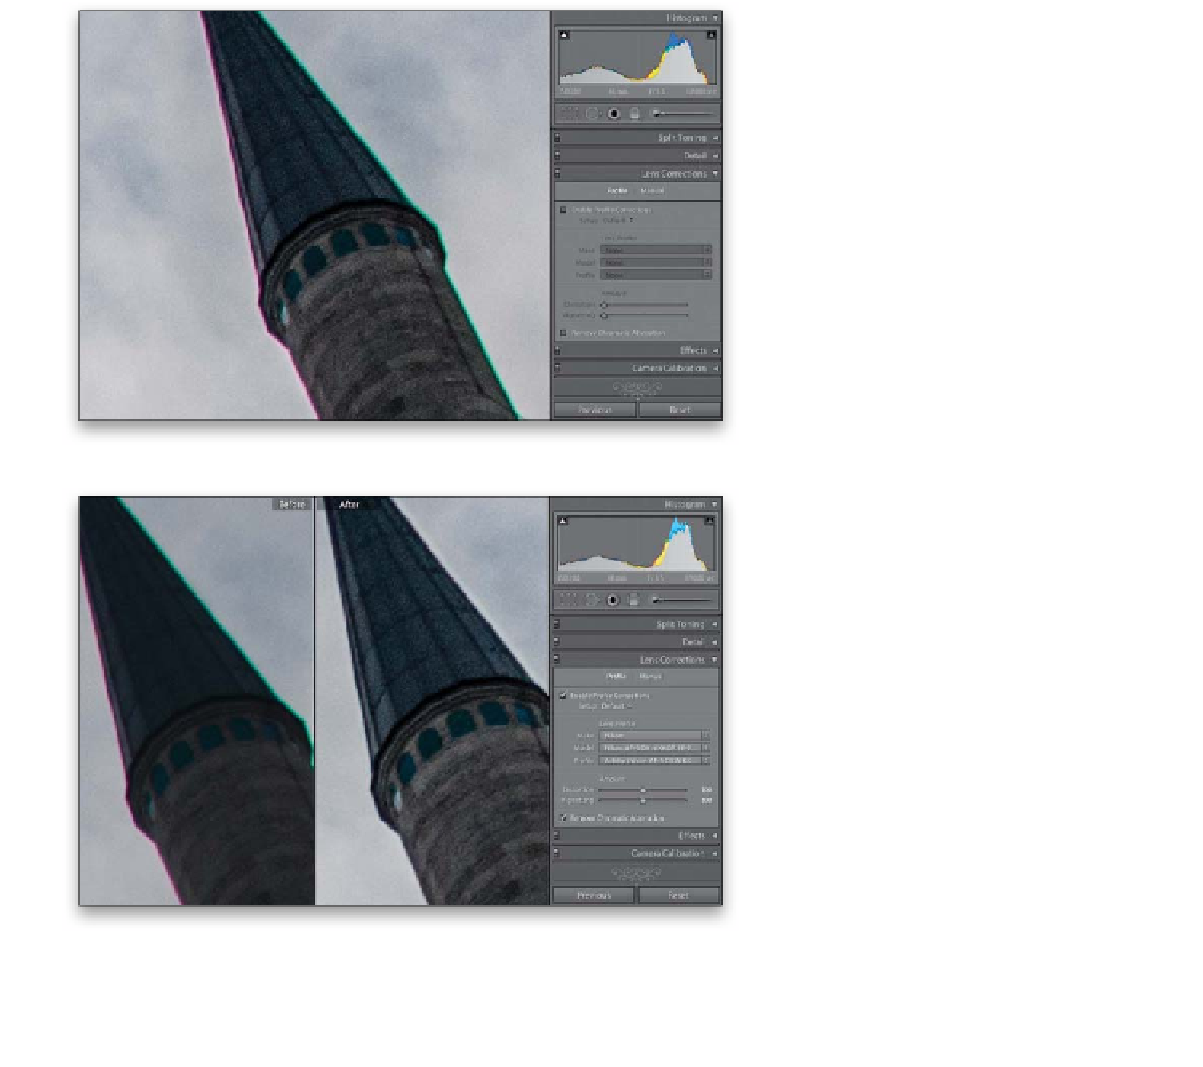
Step One:
Here I've zoomed in tight on one of
the minarets in the image we used at the
beginning of this chapter (in the project on
backlit photos). If you look at the close-up
of that image here, it looks like someone
traced around the left side with a thin pur-
ple marker and the right side with a green
marker. If this is happening to one of your
images, first go to the Lens Corrections
panel and click on Profile at the top, then
zoom in on an edge area with the color
fringe (I zoomed in to 2:1), so you can see
how your adjustments affect the edge.
Step Two:
At the top of the panel, turn on the
Enable Profile Corrections checkbox
and then turn on the Remove Chromatic
Aberrations checkbox at the bottom. This
removes the color fringe based on your
lens' make and model (it learns this from
your image's EXIF data. See page 250 for
more info), and does quite an amazing job,
I might add. That's all there is to it (much
easier than what we had to do back in
Lightroom 3). If it doesn't fully do the trick,
then try clicking on Manual at the top of
the panel and choosing All Edges from the
Defringe pop-up menu—that may remove
that edge fringe for you, as well. Here's a
before and after, after just turning on the
Remove Chromatic Aberrations checkbox,
and you can see the purple and green edge
fringe is gone.