Graphics Programs Reference
In-Depth Information
Step Nine:
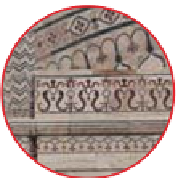
Here, I reopened the Taj Mahal photo
and, at this point, you know what all four
sliders do, so now it's down to you coming
up with the settings you like. But if you're
not comfortable with that quite yet, then
take advantage of the excellent sharpen-
ing presets that are found in the Presets
panel in the left side Panels area. If you look
under the Lightroom Presets (the built-in
ones), you'll find two sharpening presets:
one called Sharpen - Scenic and one called
Sharpen - Faces. Clicking the Scenic preset
sets your Amount at 40, Radius at 0.8,
Detail at 35, and Masking at 0 (see how it
raised the detail level because the subject
matter can take punchier sharpening?).
The Faces one is much more subtle—it
sets your Amount at 35, Radius at 1.4,
Detail at 15, and Masking at 60.
Step 10:
Here's the final before/after image. I started
by clicking on the Sharpen - Scenic preset,
then I increased the Amount to 125 (which
is more than I usually use, but I pumped
it up so you could see the results more
easily here in the topic). I set the Radius at
1.0 (which is pretty standard for me), the
Detail at 75 (because a detailed photo like
this can really take that punchy sharpen-
ing), and I left the Masking at 0 (because I
want all the areas of the photo sharpened
evenly—there are no areas that I want to
remain soft and unsharpened). Now, at
this point I'd save this setting as my own
personal “Sharpening - High” preset, so
it's always just one click away. (You learned
how to do that back in Chapter 6.)


