Graphics Programs Reference
In-Depth Information
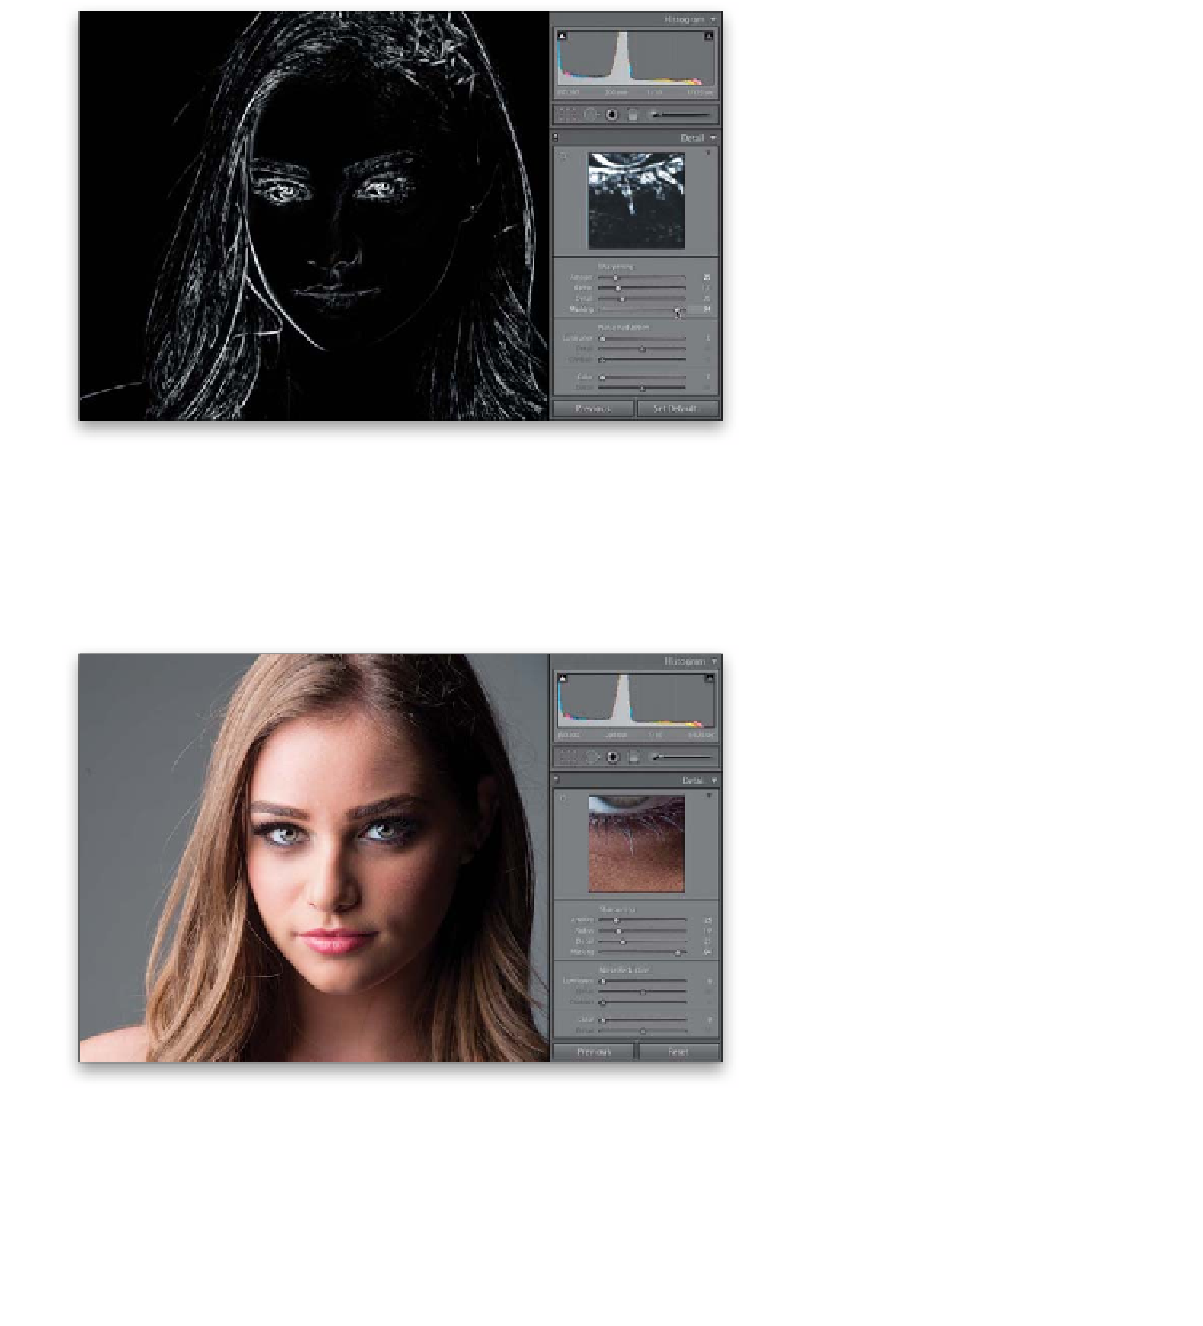
Step Seven:
As you click-and-drag the Masking
slider to the right, parts of your photo will
start to turn black, and those black areas
are now not getting sharpened, which is
our goal. At first, you'll see little speckles
of black area, but the farther you drag
that slider, the more non-edge areas will
become black—as seen here, where I've
dragged the Masking slider over to 94,
which pretty much has the skin areas in
all black (so they're not being sharpened),
but the detail edge areas, like the eyes, lips,
hair, nostrils, and outline, are being fully
sharpened (which are the areas still appear-
ing in white). So, in reality, those soft skin
areas are being automatically masked away
for you, which is really pretty darn slick if
you ask me.
Step Eight:
When you release the Option (PC: Alt) key,
you see the effects of the sharpening, and
here you can see the detail areas are nice
and crisp, but it's as if her skin was never
sharpened. Now, just a reminder: I only
use this Masking slider when the subject
is supposed to be of a softer nature, where
we don't want to exaggerate texture. Okay,
on the next page, we're going to switch
back to the Taj Mahal photo and finish
up our sharpening there.
Continued