Graphics Programs Reference
In-Depth Information
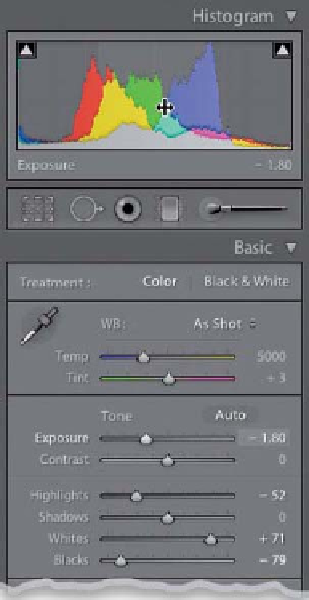
Step Nine:
Before we move on, there are a few things
you should know about the Histogram
panel (at the top of the right side Panels
area). Even without looking at the clipping
triangle, just looking at the histogram, you
can tell if your highlights are blown out.
For example, if your histogram shows a
bunch of pixels stacked up against the far
right-side wall, it tells you right there that
plenty of your highlights are clipped (ide-
ally, you'd have a little gap at the right end
of your graph, with nothing touching the
right-side wall). But beyond just giving you
a readout, it can help you figure out which
slider adjusts which part of the histogram.
Tr y this: move your cursor over par t of the
histogram and then look directly below
the histogram itself, and you'll see not only
the name of the slider which affects that
part of the histogram, it even highlights
the number field of that slider down in
the Tone section for you to make it easier
to find (as seen here). Here, my cursor is
over the far-right side, and you can see
that the Whites slider is what would affect
that far-right side of the histogram. Pretty
helpful—but there's more.
Step 10:
You can actually click-and-drag any where
right on the histogram itself, and as you
drag left or right, it literally moves that
part of the histogram (and the accom-
panying slider) as you drag. That's right,
you can do your corrections by just drag-
ging the histogram itself. You gotta try
this—just move your cursor up over the
histogram, click, and start dragging. By the
way, in all honesty, I don't personally know
anyone that actually corrects their photos
by dragging the histogram like this, but it
sure is fun just to give it a try.
Continued