Graphics Programs Reference
In-Depth Information
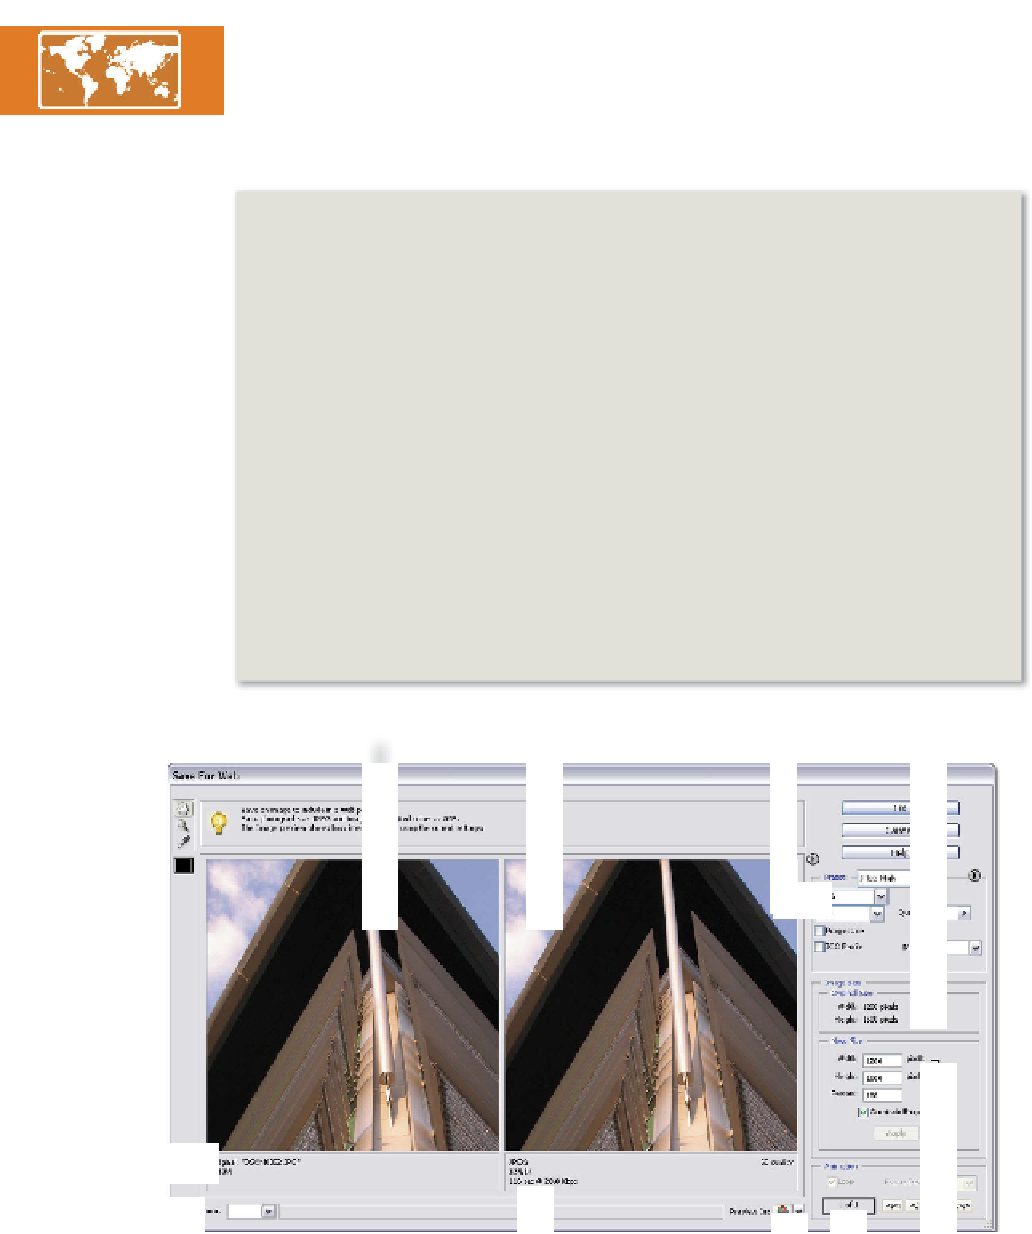
By carefully checking the preview of the compressed image (at 100% magnification) and the
file size readout at the bottom of the screen, it is possible to find a point where both the file
size and image quality are acceptable.
By clicking OK you can save a copy of the compressed file to your hard drive ready for at-
tachment to an email or use in a web page.
Creating web-ready images:
1 With an image already open in Elements, pick the Save for Web (Editor: File >
Save for Web) or Save As (Editor: File > Save As > JPEG 2000 - Elements 2.0 to
8.0 only) option.
2 Adjust the magnification of the images in the preview windows to at least 100%
by using the Zoom tool or the Zoom drop-down menu.
3 Select the file format from the Settings area of the dialog.
4 Alter the image quality for JPEG and JPEG 2000 or the number of colors for GIF
and PNG8.
5 Assess the compressed preview for artifacts and check the file size and estimated
download times at the bottom of the dialog.
6 If the results are not satisfactory, change the settings and recheck file size and
image quality.
7 Click OK to save the compressed, web-ready file.
Before
preview
After compression
preview
Compression type and
associated settings
Original pixel
dimensions
Original name
and file size
Zoom
level
The Elements Save for Web feature produces a side-by-side
comparison of your image before and after compression.
The Save for Web option is available from both the Full and
Quick Fix editor workspaces.
File size and predicted
download time after
compression
Animation
settings for
GIF format
Preview in
browser
New
pixel size
settings


Search WWH ::

Custom Search