Graphics Programs Reference
In-Depth Information
Pencil tool for marking
areas to be copied from
the source to the final
photo
Eraser for removing
marked areas
Alignment controls
Pixel blending
Source photo
preview
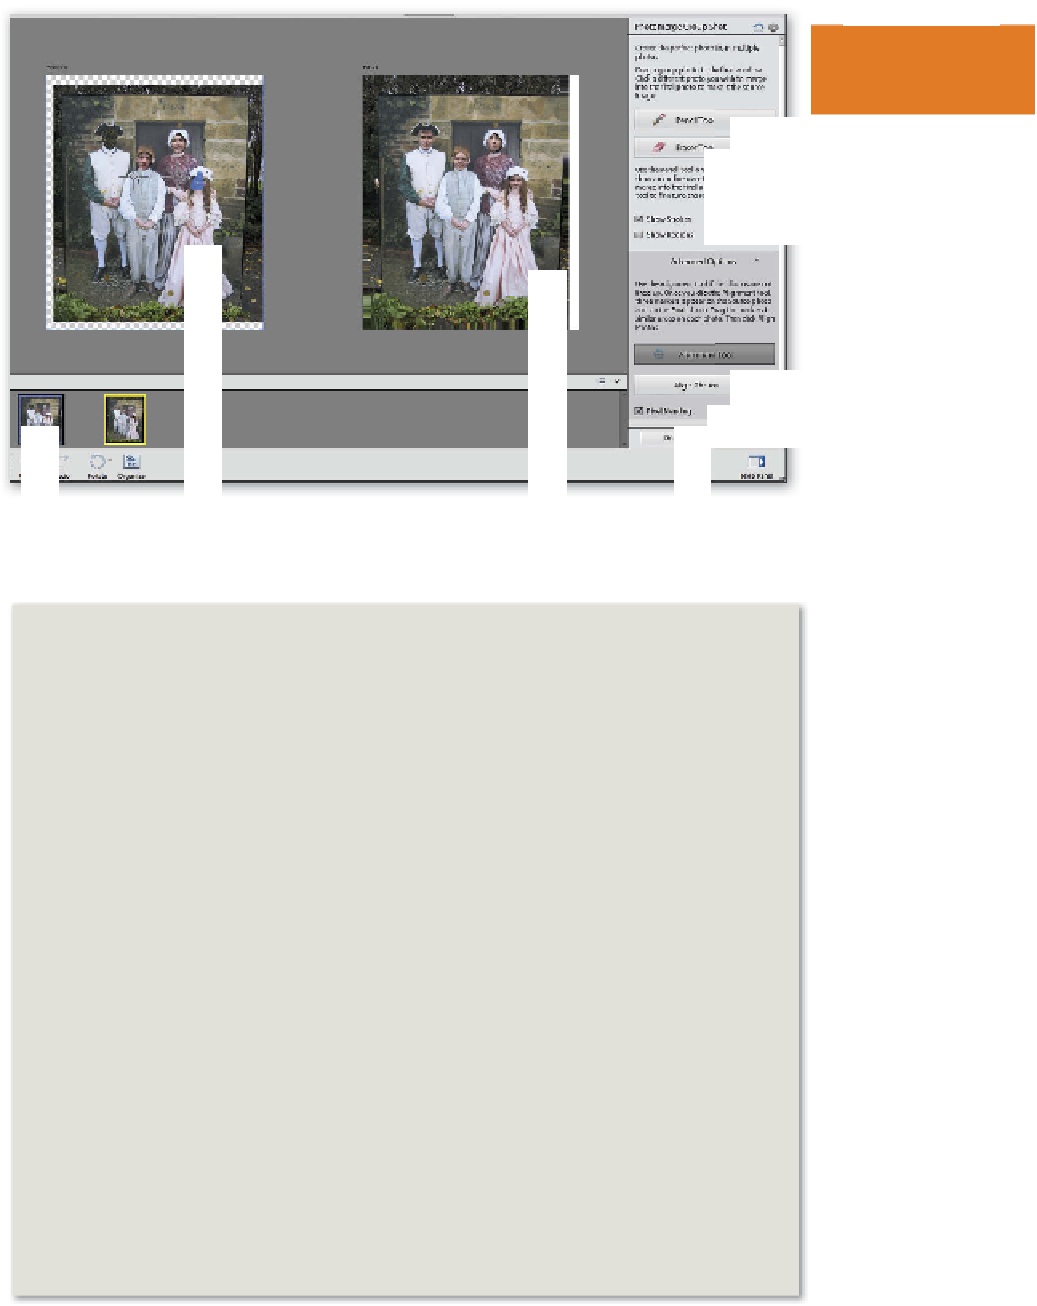
The Photomerge Group
Shot workspace contains
the tools and the instruc-
tions needed to blend
photo image parts togeth-
er. To start the process
select the images in the
Organizer workspace and
then choose Enhance >
Photomerge Group Shot.
Source
photos
Final photo
preview
Guided edit
instructions panel
Photomerge Group Shot workflow:
In this example, not having a tripod handy is not a problem when it comes time to
capture a portrait of the whole family on holidays. Simply take two photos of the same
scene, swapping the family member who is acting as the photographer, and then use
the Photomerge Group Shot utility to merge the best part of both photos. Here's how:
1 Start by locating the source files that you will use to create your montaged image
in the Organizer workspace.
2 Multi-select the pictures and then transfer the photos to the Guided edit work-
space by choosing Enhance > Photomerge Group Shot. This action will open the
pictures into the Group Shot panel and select the Group Shot instructions.
3 Automatically Elements will position one of the images in the Source preview
(left). Drag the best photo from the Photo Bin to the Final preview space. This will
act like a background to which you will add other image parts.
4
Now click onto the Pencil tool in the Group Shot panel and paint over the picture
parts from the source file that you want to add to the final image. Here it is the
faces. Adjust the pencil size with the Size control in the options bar. Use the Eraser
tool to remove pencil marks and refine the size and shape of the Source area used
for the montage. To see the area in the final photo affected by the change, click the
Show Regions option. This will display regions that are tinted the same color as
the source photo.


Search WWH ::

Custom Search