Graphics Programs Reference
In-Depth Information
It is not often that you can complete a specific technique in a single step. In most cases you
will find that the selection creation process contains many steps and employs a variety of
tools and features. In this section we'll look at the ways that you can modify and manage
the selections you create.
Different selection modes are available as buttons on the options bars of the various Selec-
tion tools in Photoshop Elements. You can change the selection mode by clicking onto one of
these buttons or by using associated shortcut keys.
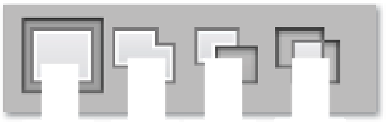
These choices in the selection tools options bar deter-
mine how any newly-created selection interacts with
any existing ones.
(1) New selection.
(2) Add to selection (Shift).
(3) Subtract from selection (Alt/Opt).
(4) Intersect with selection (Shift Alt/Opt).
1 2 3 4
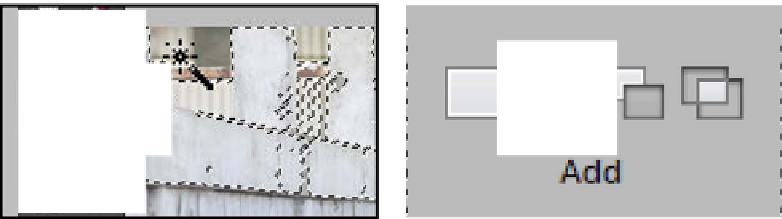
Adding to a selection
By default most tools are set to create a new selection when first picked from the toolbar. To
add to an existing selection, you will need to hold down the Shift key whilst selecting a new
area. Notice that when the Shift key is pressed the selection tool's cursor changes to include
a '+' to indicate that you are in the 'Add to Selection' mode.
As well as using the Shift key you can also pick the 'Add to Mode' from the tool's options bar
in Photoshop Elements. This switches the actual mode of the tool.
Step-by-step adding to a selection:
Follow these steps to include other picture parts in your selection.
1
2
Create a Selection First:
Start by creating an initial selection. Use any of the
Selection tools for this step.
Use Shift to Add to a Selection:
With the selection tool still selected, hold down the
Shift key and continue to define picture areas to
include in the now extended selection. It is also
possible to change selection tools at this point and use
a different tool to add to an existing selection.


Search WWH ::

Custom Search