Graphics Reference
In-Depth Information
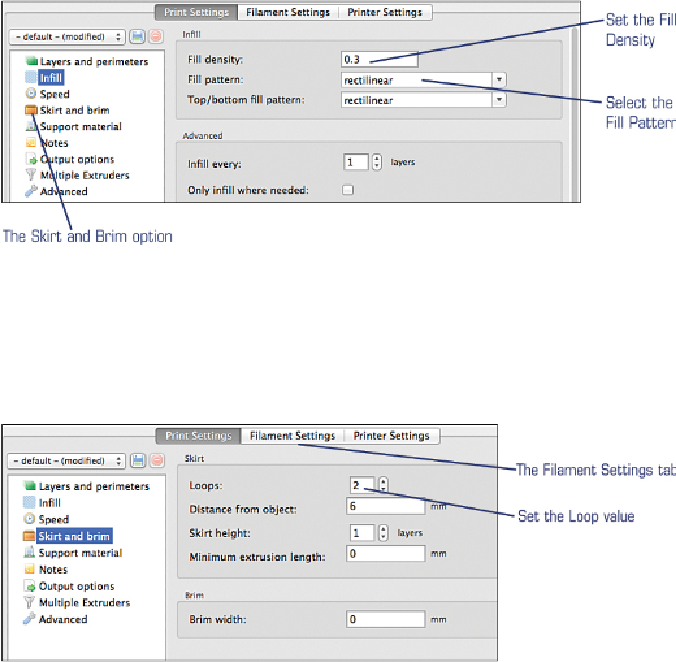
For the Fill Density, change the value to 0.3. Click the Fill Pattern drop-down
menu and select Rectilinear from the various options, as shown in
Figure 4.11
.
Make no other changes and then click the Skirt and Brim option.
Figure 4.11
Configure the Infill details for a printed object.
On the Skirt and Brim screen, set the Loops option to a value of 2, as shown in
Figure 4.12
. (These will force a number of test loops to be printed around your
object on the print bed before the actual printing of the object begins. It's a great
way to make certain the molten plastic is coming out of the nozzle and adhering to
the print bed.) Make no other changes and then click the Filament Settings tab.
Figure 4.12
Create a test loop around your printed object.
Make sure the Filaments option is selected on the left side of the screen, and then
change the Diameter value to 1.70 (mm), as shown in
Figure 4.13
. Make no other
changes and then click the Cooling option.
Search WWH ::

Custom Search