Graphics Reference
In-Depth Information
higher than the maximum Z axis print size of your 3D printer. Right now, there is
no way to limit the height of an object created in Tinkercad.
In the upper-left corner of the screen are a few more buttons that include Design,
Edit, and Help. The Edit drop-down menu offers Copy, Paste, Duplicate, and
Delete options (but keyboard shortcuts make performing these four tasks much
faster). The Help menu provides access to a basic video tutorial and a Learn More
About Tinkercad option. Unfortunately, neither of these are all that helpful; hope-
fully, AutoDesk might add some Help files and additional videos over time—and
you're likely to find more help by doing a Google search for Tinkercad assistance.
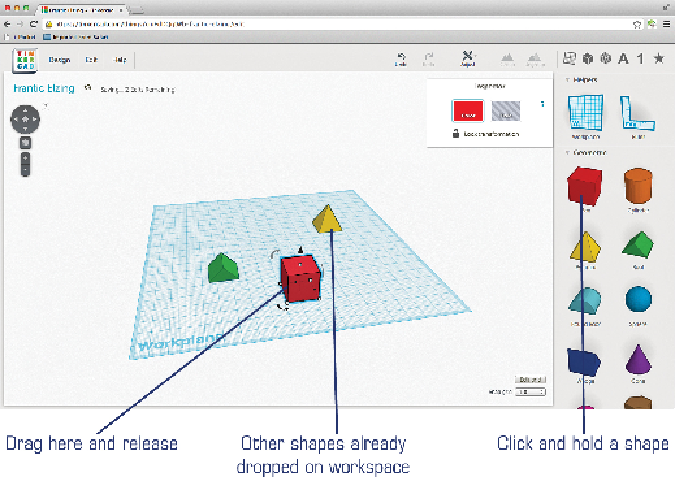
Creating simple objects in Tinkercad doesn't get much easier. You drag and drop
basic shapes on the workspace, as shown in
Figure 6.7
.
Simply click and hold on a
shape from the scrollable window on the right (such as the Box) and drag it to the
workspace before releasing your mouse button.
Figure 6.7
Drag and drop objects on the workspace.
Shape sizes and orientations are modified by clicking an object once to select it.
As you can see in
Figure 6.8
, an object displays certain smaller icons that are used
to resize, rotate, and perform other tasks. (Note that I've zoomed in on the cube
Search WWH ::

Custom Search