HTML and CSS Reference
In-Depth Information
Create the thumbnails
You've got a place to put your thumbnails, so let's create them. Start by
opening “seattle_video_med.jpg” with your photo editing application.
You're going to resize it to 150 by 100 pixels using the same method you
used to create the 600 by 400 version:
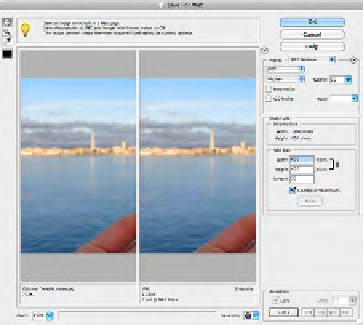
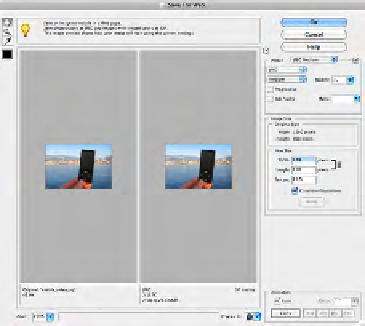
In Ph
otosh
op Ele
ments
,
choo
se the
“Save
for W
eb”
menu
optio
n.
If you're working with the example
files, you'll find the thumbnails
already in the “thumbnails” folder,
so you don't have to do every one
(after all, you're learning HTML,
not batch photo processing).
With the image resized, choose OK and save it as the same name but
in the thumbnail folder
.
Be careful
: if you save it to the “photos” folder,
you'll be replacing the larger image.
Now, repeat this for each photo in your “photos” folder.
What about the photos
from Birmingham—they are
taller than they are wide. Does
150x100 make sense?
Good catch. Because these images are taller than
they are wide, we have two choices: we can switch
the dimensions and make them 100 by 150, or we
can crop each image and make a 150-by-100-pixel
thumbnail from it. We're going to make ours 100
by 150; feel free to crop them and create 150-by-
100-pixel images if you'd like to explore how to do
that in your photo editing application.