Graphics Programs Reference
In-Depth Information
be modified, and the color of the bounding box indicates which layer the object is
Note
To select an item without a fill, you can click the stroke (the edge), or drag
a selection marquee across the object.
5.
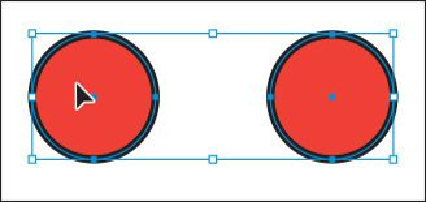
Using the Selection tool, click in the red circle on the right. Notice that the left red
circle is now deselected and only the right circle is selected.
6.
Hold down the Shift key, and click the left red circle to add it to the selection. Both
red circles are now selected, and a larger bounding box surrounds them.
7.
Reposition the circles anywhere in the document by clicking inside either selected
circle (in the red area) and dragging. Because both circles are selected, they move
together.
As you drag, you may notice the green lines that appear. These are called
align-
ment guides
and are visible because Smart Guides are turned on (View > Smart
Guides). As you drag, the objects are aligned to other objects on the artboard. Also
notice the measurement label (gray box) next to the pointer that shows the object's
distance from its original position. Measurement labels also appear because Smart
Guides are turned on.
8.
Deselect the circles by clicking the artboard where there are no objects or by
choosing Select > Deselect.
9.
Revert to the last saved version of the document by choosing File > Revert. In the
dialog box that appears, click Revert.