Hardware Reference
In-Depth Information
Figure 8-9.
Remove drive trays by squeezing both metal clips and
pulling the drive tray straight out of the chassis
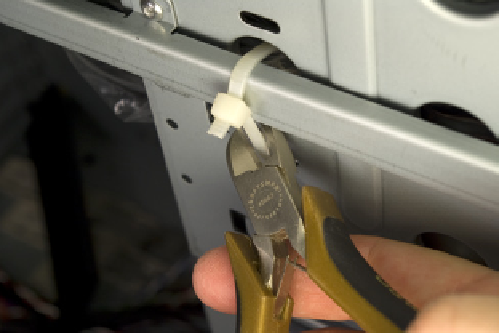
Figure 8-10.
Cut the cable tie that secures the parts bag to the
chassis
InstallingtheHardDrive(s)
The next step is to install the hard drive(s). To begin, place the hard drive in-
verted (circuit board-side up) on a flat surface and position a drive tray on top
of it, as shown in Figure 8-11. Make sure the drive and drive tray are oriented
correctly, with the front of the hard drive on the side of the drive tray that has
the metal clips. The rear of the hard drive, with the power and data connectors,
should protrude from the rear of the tray, as shown in Figure 8-11.
Flat Versus Phillips
Yes, we used a flat-blade screw-
driver to secure the hard drives. The
special hard-drive mounting screws
Antec supplies have a combination
straight/Phillips head, but the Phillips
portion is so shallow that we were
able to get a better grip with the flat-
blade screwdriver.
Locate four of the special hard drive mounting screws in the parts bag. (One
of these screws is shown at the bottom left of Figure 8-11.) Align the holes
in the rubber grommets on the drive mounting tray with the screw holes in
the bottom of the hard drive, and secure the hard drive by driving in the four
screws. Tighten the screws finger-tight plus a quarter turn or so, but be careful
not to overtighten them. Overtightening eliminates the noise- and vibration-
damping benefits of the grommets. Repeat this procedure for each of your
hard drives.
Locate as many SATA data cables as you have hard drives. The SATA ports on
your motherboard may be numbered starting with 0 or 1. (The ASRock mother-
board we used uses both numbering methods.) Use a felt-tip pen to label each
SATA data cable on both ends with the number of the drive/port you'll use it
with, as shown in Figure 8-12. Label both sides of each cable to make sure the
label will be visible after the cables are installed.
Connect a SATA data cable to each of your hard drives, as shown in Figure
8-13. The connector is keyed with an L-shaped socket and plug. Make sure the
cable connector and drive connector are aligned properly and then press the
cable connector straight in until it seats. Avoid placing any lateral pressure or
torque on the connectors, which are relatively fragile. Install the other SATA
data cables on the remaining hard drive(s), if any.