Hardware Reference
In-Depth Information
InstallingMemory
The D510MO motherboard comes with the Atom processor and CPU cooler
preinstalled, so all we need to do to prepare the motherboard is install the
memory modules.
Avoid Static Shock
Before handling memory modules or
other static-sensitive components,
first touch the chassis frame to
ground yourself.
Installing memory in the Intel D510MO motherboard is straightforward. We
have two memory modules to install, and two memory slots available.
To begin, ground yourself. Place the antistatic wrapper from the D510MO
motherboard on a flat surface, and place the motherboard atop the wrapper.
Pivot the white plastic locking tabs on both sides of both DIMM sockets out-
ward to prepare the slots to receive DIMMs, as shown in Figure 7-8.
Orient the first DIMM with the notch in the contact area of the DIMM aligned
with the raised plastic tab in the DIMM socket and slide it into place, as shown
in Figure 7-9.
Figure 7-8.
Pivot the DIMM slot locking tabs outward to prepare
the slot to accept a DIMM
Figure 7-9.
Orient the DIMM with the notch aligned properly with
the socket
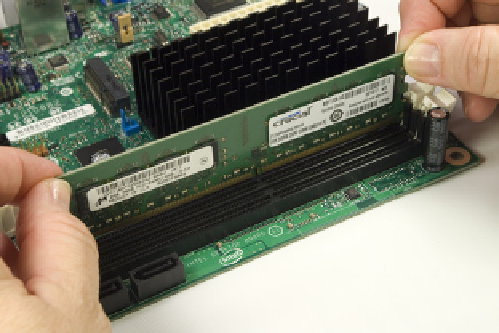
With the DIMM properly aligned with the slot and oriented vertically relative to
the slot, use both thumbs to press down on the DIMM until it snaps into place.
The locking tabs should automatically pivot back up into the locked position,
as shown in Figure 7-10, when the DIMM snaps into place. If they don't, close
them manually to lock the DIMM into the socket, as shown in Figure 7-11.
Repeat this procedure for the second DIMM. With the memory installed, you're
almost ready to install the motherboard in the case. Before you do that, check
the motherboard documentation to determine if any configuration jump-
ers need to be set. The Intel D510MO has only one jumper, the BIOS Setup
configuration jumper, which sets operating mode. On our motherboard, that
jumper was set correctly to Normal (pins 1 and 2 jumpered) by default, so we
proceeded to the next step.