Game Development Reference
In-Depth Information
Figure 7.3
Place the Biped skeleton's hip section in the character's hips.
6. If your model is the same size as mine, then the height of the Biped skeleton
should be 98.
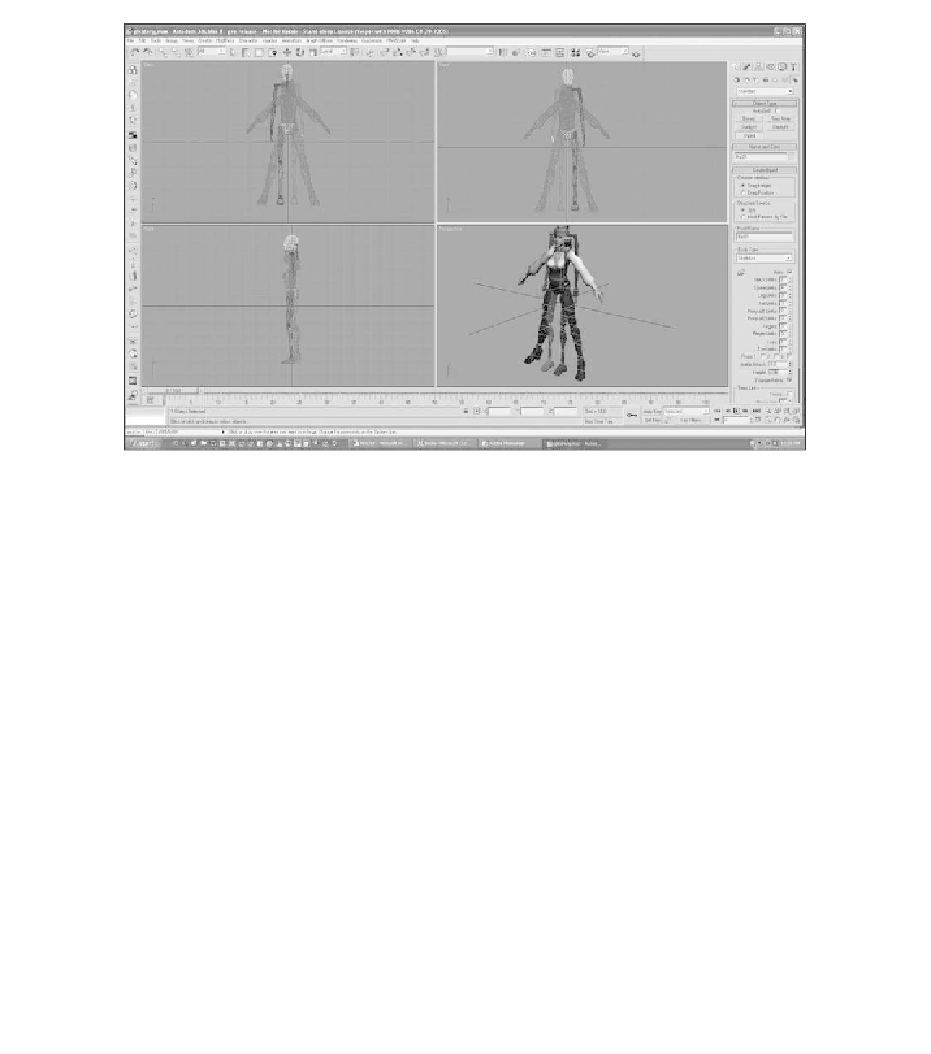
7. Now you need to line up the Biped skeleton with the model. Go to the
Motion tab and click on it to bring up the Motion rollouts, as shown in
Figure 7.4.
8. You need to work in Figure mode when scaling, moving, or rotating the
Biped skeleton to fit the model. Turn Figure mode on by clicking on the
icon of a figure in the Biped rollout.
9. You can now use the manipulator tools to position the Biped skeleton. To
move the entire skeleton, select the white diamond-shaped node inside the
pelvis. This node is called the COM, which stands for
Center Of Mass
. First,
use the Move tool to slide the Biped horizontally to the center of the model,
as shown in Figure 7.5.
10. Next, in the Side view, center the pelvis in the hips, as shown in Figure 7.6.
11. Now, you need to work on the legs. Select the skeleton's left thigh link; it is
the one colored blue (see Figure 7.7).