Graphics Programs Reference
In-Depth Information
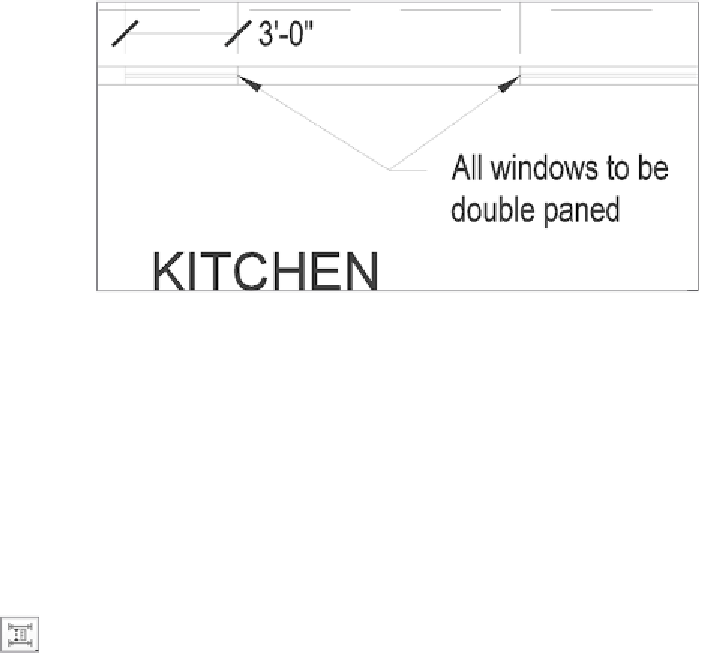
7.
Click the grip at the tip of the left leader and then move the grip to
the end of the inner pane of the left window (see Figure 12.58).
8.
Click the grip at the tip of the right leader, and move the grip to the left
end of the inner pane of the right window (also shown in Figure 12.58).
FiGuRE 12.58
Using grips to move the position of leader lines
Adjusting Space between Stacked Dimensions
Dimensions for the back deck are stacked in three rows. Since each row of dimen-
sions was placed visually, the spacing between each row is an arbitrary distance. The
Adjust Space tool can help fix spacing variations like this one, helping you produce a
more polished and professional-looking drawing. To use the Adjust Space tool:
1.
Zoom into the area around the back deck so the deck, stairs, and
dimensions are each visible.
2.
Start the
DIMSPACE
command by selecting the Adjust Space tool
found on the Dimensions panel on the Annotate tab.
3.
From the
Select base dimension:
prompt, pick the 7
′
0½
″
dimension.
The command line prompts you to select the dimensions to space.
4.
Select the remaining dimensions for the back deck, as shown in
Figure 12.59, and press
↵
.
5.
After selecting the dimensions to space, you are given an option about
how you would like them spaced. You can enter a custom value of your
choice or let AutoCAD determine the best spacing for you.
Press
↵
to accept the default Auto option. The command ends,
and all three rows of dimensions are equally spaced, as shown in
Figure 12.60.

Search WWH ::

Custom Search