Graphics Programs Reference
In-Depth Information
4.
Set up your osnaps and status bar options so that Polar Tracking and
Object Snap are on and the Endpoint and Midpoint osnaps are running.
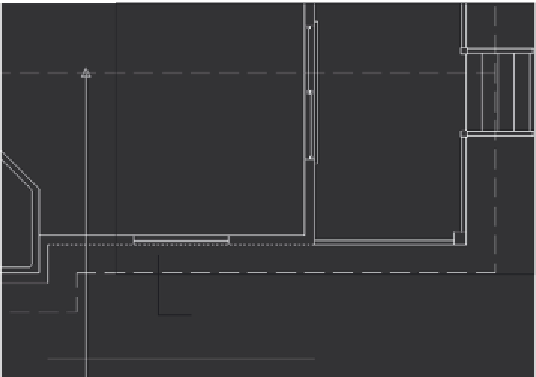
Drop a line from the midpoint of the ridgeline in the floor plan
straight down to a point near the bottom of the screen.
5.
Offset the horizontal, outside wall line to the right of the pop-out in
the floor plan down
6
′
(
1830
mm), as shown in Figure 8.8.
6.
From the Text Style drop-down menu down found on the Annotate
tab
➢
Text panel, verify that the A-Title text style is current.
The current text style is changed to A-Title, and any new text objects
you create will use this style.
Draw this line.
Offset this line downward 6
′
-0
″.
FiGuRE 8.8
The new lines created after offsetting the ridge line and
the pop-out
7.
Click the down arrow below the Multiline text button in the Text panel
and click the Single Line Text button in the fly-out menu, or enter
DT
↵
to start the
TEXT
command—the command used for single-line text.
The command window reports information about the current
text style:
Current text style: “A-Label” Text height: 1'-0”
Annotative: No
, and then prompts you:
Specify start point of
text or [Justify/Style]:
.
You will use the Justify option to change the justification to Middle.
the
justification
point
for the text
functions like the
insertion point for
blocks.
8.
Enter
J
↵
or press the down arrow on the keyboard until Justify is
selected at the cursor prompt, and then press
↵
.


Search WWH ::

Custom Search