Graphics Programs Reference
In-Depth Information
The resulting location is at the intersection of the midpoint of the two sides of
the rectangle at the center point. More importantly you didn't spend any unnec-
essary time drawing and then erasing construction lines. Let's take a look at how
you can employ this same method to finish the back deck. Follow these steps:
1.
Make sure
05A-FPLAY3.dwg
is open.
2.
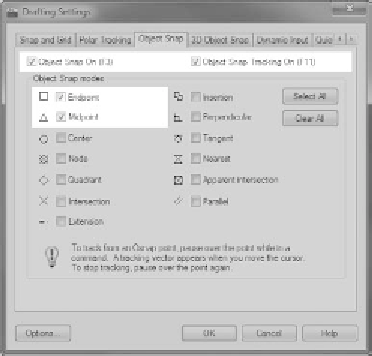
Verify that Polar Tracking, Object Snap, and Dynamic Input are still
enabled and then turn on the Midpoint and Endpoint object snaps
from the Drafting Settings dialog box, as shown in Figure 5.35.
FiGuRE 5.35
Enabling the Endpoint and Midpoint object snaps from the
Drafting Settings dialog box
3.
Create a crossing selection window around the stairs, stair handrails,
and stair posts, as shown in Figure 5.36.
4.
At the
Specify base point or:
prompt, use the Midpoint osnap and
pick the midpoint of the top step.
5.
At the
Specify second point or:
prompt, hold the Shift key down
and right-click to open the Osnap context menu; then choose Point
Filters
➢
.X (Figure 5.37).
This will allow you to pick a point that is horizontally (X) equal to
the same location as the point you selected in step 2 and vertically
(Y) equal to the midpoint of the threshold.
The prompt in the command window has .X appended to indicate
that AutoCAD will use only the X component of the next location picked.

Search WWH ::

Custom Search