Graphics Programs Reference
In-Depth Information
3.
Double-click inside the viewport and then select Model Views
Temp from the 3D
Views menu on the viewport controls.
4.
Make sure the Sun Status button in the expanded Status Bar palette is on.
5.
Double-click outside the viewport, and then copy the viewport so you have an identical
viewport near the original (Figure 21.28).
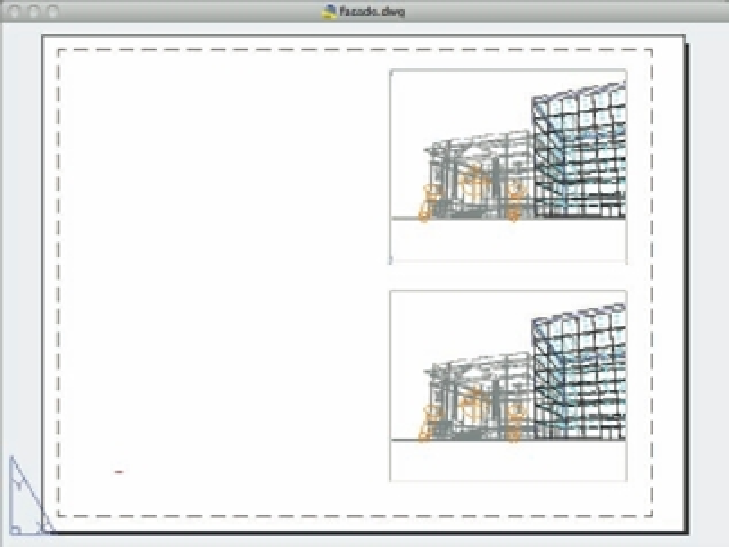
FIGURE 21.28
The preview with
duplicate views
Now you're ready to set up the viewport to render the views in specifi c ways. For example,
you can set one viewport to render as a fully rendered view while rendering another viewport
as a hidden-line view:
1.
Click the border of the top viewport, right-click, and choose Shade Plot
Rendered.
2.
Click the border of the lower viewport, right-click, and choose Shade Plot
Hidden.
3.
Choose File
Print on the menu bar.
4.
Choose a printer name for the Printer pop-up menu, and then click Preview. After a
moment, you see a preview of your plot showing a fully rendered view in the top view-
port and a hidden-line view in the lower viewport (Figure 21.29).
You can add viewports to include fl oor plans and elevations if needed. Another option is to
add isometric views with labels that point out drawing features.
You also have control over the quality of the rendered viewport. Choose File
Page Setup
Manager on the menu bar. The Page Setup Manager dialog box opens. Click the Gear icon just
below the Current Layout list, and choose Edit to open the Page Setup dialog box. Next, click the
Advanced button. You can use the 3D Viewports group to select from a pair of viewport-quality
settings (Figure 21.30).