Graphics Programs Reference
In-Depth Information
7.
To name this viewport arrangement, enter
My Viewport
in the New Name input box.
8.
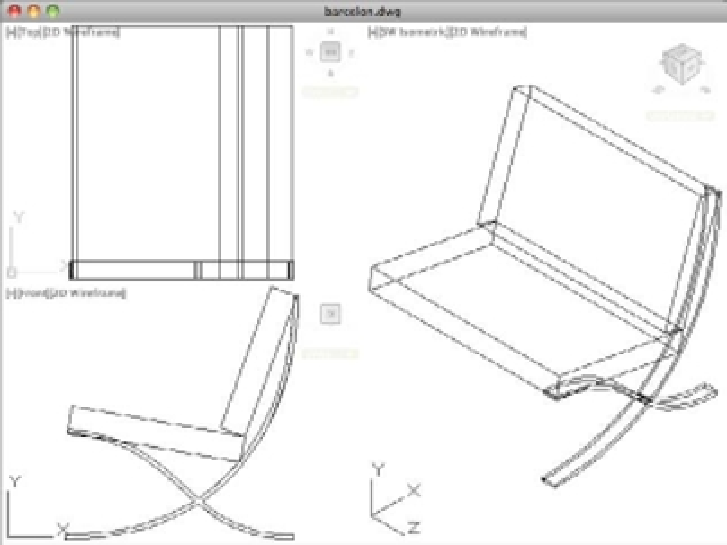
Click OK. Your display changes to show three viewports arranged as they were indicated
in the Viewports dialog box (Figure 20.18).
FIGURE 20.18
Three viewports,
each displaying a
different view
You've set up your viewports. Let's check to see that your viewport arrangement was saved:
1.
Choose View
Viewports
Named Viewports from the menu bar to open the
Viewports dialog box again.
2.
Make sure the Named Viewports tab is selected. My Viewport is listed in the Named
Viewports list. If you click it, a sample view of your viewport arrangement appears on
the right.
3.
After you've reviewed the addition to the Named Viewports list, close the dialog box.
Now, take a close look at your viewport setup. The UCS icon in the orthogonal views in the
two left viewports is oriented to the plane of the view. AutoCAD enables you to set up a dif-
ferent UCS for each viewport. The top view uses the WCS because it's in the same plane as the
WCS. The side view has its own UCS, which is parallel to its view. The isometric view to the
right retains the current UCS.
Look at the 3D Views menu on the Viewport Controls for each viewport. Notice that they
show the view name for each view: Top, Front, and SW Isometric. You can change these settings
individually for each viewport.
Another Viewports dialog box option you haven't tried yet is the Apply To pop-up menu in
the New Viewports tab (Figure 20.19).