Graphics Programs Reference
In-Depth Information
FIGURE 20.12
Using the Origin
option to shift
the UCS
Old UCS origin location
New UCS origin location
UCS Rotated around an Axis
Suppose you want to change the orientation of the X, Y, or Z axis of a UCS. You can do so by
using the X, Y, or Z fl yout on the Tool Sets palette's Coordinates tool group (Figure 20.13). These
are perhaps among the most frequently used UCS options.
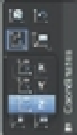
FIGURE 20.13
The X, Y and Z fl y-
out in the Tool Sets
palette's Coordi-
nates tool group.
Click and hold
the X tool to
open the flyout.
1.
Click and hold the X tool from the Coordinates tool group of the Tool Sets palette and
release the cursor over Z from the fl yout. You can also choose Tools
New UCS
Z on the
menu bar or type
UCS
↵
Z
↵. This enables you to rotate the current UCS around the Z axis.
2.
At the Specify rotation angle about Z axis <90>: prompt, press ↵ to accept the
default of 90°. The UCS icon rotates about the Z axis to reflect the new orientation of the
current UCS (Figure 20.14).
Similarly, the X and Y options enable you to rotate the UCS about the current X and Y axis,
respectively, just as you did for the Z axis earlier. The X and Y tools are helpful in orienting a UCS
to an inclined plane. For example, if you want to work on the plane of a sloped roof of a building,
you can fi rst use the Set UCS Origin tool to align the UCS to the edge of a roof, and then use the X
icon to rotate the UCS to the angle of the roof slope, as shown in Figure 20.15. Note that the default
is 90°, so you only have to press ↵ to rotate the UCS 90°, but you can also enter a rotation angle.