Graphics Programs Reference
In-Depth Information
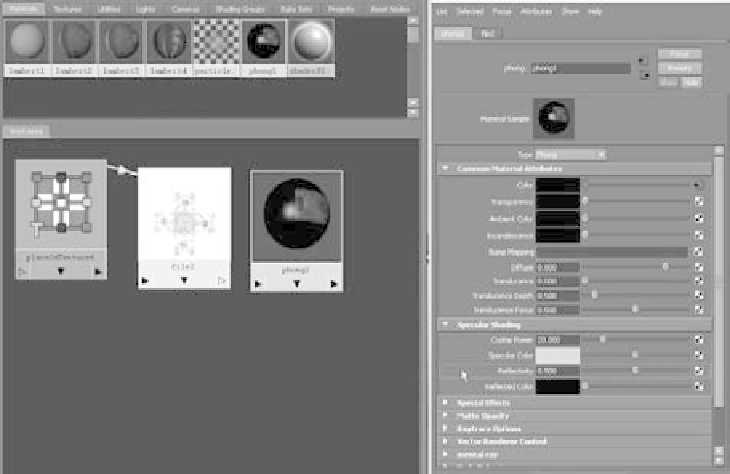
Figure 11.91
Map the new image
file to the reflectiv-
ity attribute.
4. MMB-drag the phong1 node from the top of the Hypershade window down to the
work area, alongside the file2 node. Double-click the phong1 node to open the Attri-
bute Editor. MMB-drag the file2 node onto the Ref lectivity attribute for the Phong2
shader, as shown in Figure 11.91.
5. Notice the connection line in the Hypershade
between the file2 and phong1 nodes. The white areas
of the map tell the phong1 shader to have a ref lectiv-
ity of 1, whereas the black areas have zero ref lectivity.
This effectively removes ref lections from the box's
carvings. Render a frame of the box in the renderCam
view, and compare to Figure 11.92. In the Render
View window, click the Keep Image icon ( ) to store
this render in the render buffer. Doing so allows you
to easily compare renders to see the changes you make
as you continue.
6. The box's ref lections are now stronger all over, and
the carvings still ref lect. You need to turn on one
switch. Select the file2 node, and open the Color Balance heading in the Attribute
Editor. Check the box for the Alpha Is Luminance attribute. This instructs Maya
to use the luminance values (basically the brightness) of the image to output to the
ref lectivity attribute of the phong1 shader. The box renders properly and the carvings
have no ref lections, as shown in Figure 11.93. Save this render into the render buffer
with the Keep Image icon (
Figure 11.92
The reflections are
stronger; the entire
box looks like a
mirror!
).